
Discover the Best Car Window Cleaner for Your Vehicle
A clean and sparkling car not only enhances its appearance but also contributes to safe and enjoyable driving.
Among the essential aspects of maintaining your vehicle’s aesthetics and safety is ensuring your car windows are spotless and clear.
The key to achieving pristine windows lies in using the right car window cleaner.
In this comprehensive guide, we will delve into the world of car window cleaners, exploring the various types available, the crucial factors to consider when making a choice,
and providing expert insights into achieving the best results. Whether you’re a meticulous car enthusiast or simply want to ensure optimal visibility on the road,
this guide will equip you with the knowledge you need to select the best car window cleaner for your needs.
Join us as we unravel the secrets to streak-free, crystal-clear windows that not only elevate the visual appeal of your vehicle but also contribute to your safety and driving experience.
Let’s embark on this journey to discover the ultimate guide to choosing the best car window cleaner for your beloved automobile.
Different Types of Car Window Cleaners
When it comes to keeping your car windows immaculate, a variety of cleaning products are available to cater to different preferences and cleaning needs.
Understanding the different types of car window cleaners can help you make an informed choice for achieving the best results. Here are the primary types of car window cleaners:
Spray-On Cleaners
These are perhaps the most common type of car window cleaners. They come in spray bottles, allowing you to easily mist the cleaning solution onto the glass surface.
Spray-on cleaners are convenient for quick touch-ups and regular maintenance. They often require minimal effort to apply and wipe off, making them a popular choice for everyday use.
Foaming Cleaners
Foaming cleaners offer a unique advantage by creating a thick lather when applied. This foam clings to the window surface, ensuring better coverage and prolonged contact with dirt and grime.
The foaming action helps to loosen stubborn particles, making them easier to remove. Foaming cleaners are particularly useful for tackling heavily soiled windows and providing a more thorough clean.
Wipes and Pre-Soaked Pads
For those who prefer a no-fuss approach, wipes and pre-soaked pads offer a convenient solution. These pre-moistened materials are designed for easy one-step cleaning.
Simply take out a wipe or pad, and you’re ready to clean your windows.
This type of cleaner is ideal for on-the-go touch-ups, spot cleaning, or when you’re short on time.
Best Car Window Cleaners on the Market
When it comes to selecting the best car window cleaner, the market offers a range of options, each with its own set of features and benefits.
To help you make an informed choice, we’ve compiled a list of the top 5 car window cleaners that have garnered acclaim for their effectiveness, ease of use, and overall value.
Let’s take a closer look at these standout products:
1. Armor All Ultimate Car Detailing Kit
The Armor All Ultimate Car Detailing Kit stands as a comprehensive solution for car enthusiasts and meticulous owners seeking to elevate their vehicle’s appearance and maintain its pristine condition.

This all-inclusive kit encompasses a range of premium products carefully designed to enhance every facet of your car’s interior and exterior.
Key Benefits
-
Provides a complete set of products for a thorough car cleaning, inside and out. -
Achieve a professional-grade detailing finish without the need for expensive equipment. -
Revives the original shine of your car’s exterior, making it look like new again. -
Suitable for all types of vehicles, from cars to trucks, SUVs, and more. -
User-friendly instructions make the detailing process hassle-free, even for beginners. -
Cost-effective package compared to purchasing each product separately. -
Compact packaging allows for easy storage in your garage or trunk. -
Backed by the reputation of Armor All, ensuring customer satisfaction with the results.
User Experience
As a car enthusiast, I recently had the opportunity to try out the Armor All Ultimate Car Detailing Kit, and I must say that it exceeded my expectations in terms of quality and results.
Here is my user experience with this fantastic product:
First and foremost, the kit comes with a variety of cleaning and detailing products that cover all aspects of car care.
It includes interior cleaners, exterior cleaners, tire foam, glass cleaner, and even a microfiber towel.
This comprehensive selection allowed me to tackle every aspect of my car’s cleaning and detailing needs without having to purchase multiple individual products.
Overall, the Armor All Ultimate Car Detailing Kit is a game-changer for anyone
who likes to take care of their car’s appearance. With its wide range of effective cleaning and detailing products, ease of use, and overall convenience, it has become a go-to kit for me.
It significantly simplifies the cleaning and detailing process while delivering exceptional results. I highly recommend it to any car enthusiast or owner looking for a complete solution for their car care needs
Reasons To Like
- Comprehensive Cleaning Solution
- Professional-Level Results
- Long-Lasting Protection
Reasons to Avoid
- Applicator Quality
- Potential Overkill
2. Saker Mini Vacuum Cleaner for Car
The Saker Mini Vacuum Cleaner for automobile is a small and multipurpose cleaning gadget developed for automobile users.

This portable vacuum cleaner offers a range of features and benefits that make it an excellent choice for keeping your car interior clean and tidy.
Key Benefits
-
Comes with a variety of attachments, such as brushes and nozzles, to reach tight spaces, upholstery, and crevices with ease. -
Simple one-button operation and intuitive design make it suitable for all users -
Regular use helps maintain a clean and tidy car interior -
Easy-to-empty dustbin and washable filters simplify the cleaning and maintenance process. -
While designed for car interiors, it can also be used for cleaning small spaces at home -
Sturdy construction and quality materials ensure the vacuum’s longevity -
Reduces the need for disposable cleaning materials -
A clean interior ensures clear visibility and reduces distractions
User Experience
I recently purchased the Saker Mini Vacuum Cleaner for Car, and it has been a game-changer for keeping my car interior clean and tidy. Here’s my user experience with this fantastic device:
I appreciate the versatility of this device as well. It comes with a range of attachments and accessories that allow me to clean different surfaces in my car.
The included crevice tool is perfect for reaching between seats or in narrow gaps, while the brush attachment is ideal for removing stubborn dirt from carpets or upholstery.
The variety of tools ensures that I can clean every nook and cranny of my car effortlessly.
Overall, the Saker Mini Vacuum Cleaner for Car has exceeded my expectations. It delivers powerful suction, is easy to use and maintain, and the variety of attachments make it versatile for all car cleaning needs.
Its portable and compact design, along with the multiple power options, truly makes it a must-have for keeping my car interior spotless
Reasons To Like
- Portability and Convenience
- Effective Cleaning Power
- Cordless Operation
Reasons to Avoid
- Limited Battery Life
- Dustbin Capacity
3. Chemical Guys CWS_801 After Wash Sprayable Gloss Boosting Car Wash
The “Chemical Guys CWS_801 After Wash Sprayable Gloss Boosting Car Wash” is a specialized car care product designed to enhance the appearance of your vehicle’s paintwork after the traditional washing process.

With its unique formulation and innovative features, this product aims to provide an extra layer of shine and protection, elevating your car’s overall aesthetics.
Key Benefits
-
Suitable for various exterior surfaces, including paint, glass, chrome, and plastic -
Suitable for various exterior surfaces, including paint, glass, chrome, and plastic -
Forms a protective barrier that helps repel water, dust, and contaminants -
Leaves behind a smooth and clean surface without sticky residue -
Offers a light and enjoyable fragrance during application -
Ideal for quick touch-ups between washes to maintain a glossy appearance on the go -
Leaves your car’s surface feeling smooth to the touch -
Designed for easy use by car enthusiasts of all skill levels
User Experience
I recently had the opportunity to try out the Chemical Guys CWS_801 After Wash Sprayable Gloss Boosting Car Wash, and it has truly elevated my car washing experience.
First and foremost, I was impressed with how easy it was to use the Chemical Guys After Wash Sprayable Gloss Boosting Car Wash.
After completing a regular car wash, I simply sprayed the product onto the surface of my vehicle and then wiped it off with a microfiber towel.
The spray nozzle provided a consistent and even distribution of the product, making the application process quick and efficient.
Another benefit I noticed was the reduction in water spots and streaks.
As a drying aid, the After Wash Sprayable Gloss Boosting Car Wash prevented water from leaving unsightly marks on my vehicle’s surface. It significantly cut down the time I spent drying my car after a wash.
Overall, the Chemical Guys CWS_801 After Wash Sprayable Gloss Boosting Car Wash has exceeded my expectations.
Its ease of use, stunning glossy finish, added protection, versatility, and water spot reduction make it an exceptional product. It has become a staple in my car detailing routine, providing professional-level results that leave my vehicle looking its best.
I highly recommend it to any car enthusiast or owner looking for a reliable and effective way to boost the shine and protection of their vehicle.
Reasons To Like
- Enhanced Gloss
- Easy Application
- Versatile Use
Reasons to Avoid
- Temporary Effects
- Performance Variability
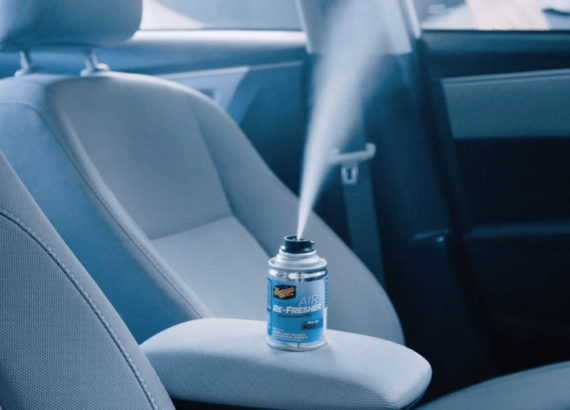
4. Meguiar’s Complete Car Care Kit
The Meguiar’s Complete Car Care Kit is a comprehensive and all-inclusive solution for achieving a showroom-worthy finish for your vehicle.

This kit contains a range of high-quality products designed to clean, polish, and protect your car’s exterior and interior surfaces.
Key Benefits
-
All-in-one kit eliminates the need to purchase individual products -
Simplifies the car care process with easy-to-follow instructions and a range of products in one package. -
Designed for both beginners and enthusiasts -
Offers a cost-effective option for those seeking a complete car care solution -
Meguiar’s is a well-established and reputable brand known for producing high-quality automotive care products. -
Provides products for both exterior and interior care
User Experience
I recently had the opportunity to use the Meguiar’s Complete Car Care Kit on my vehicle, and I must say, it exceeded my expectations in terms of simplicity and effectiveness.
Here’s my user experience with this fantastic kit:
To begin with, the Meguiar’s Complete Car Care Kit provided all the necessary solutions for a complete car care routine.
From cleaning and protecting the exterior surfaces to freshening up the interior, this kit had it all.
I appreciated not having to purchase individual products, as it saved me time and ensured that all the products worked well together.
I was particularly impressed with the scratch removal and polishing process.
The included ScratchX 2.0 effectively removed light scratches and swirl marks from my car’s surface.
The microfiber cloth and applicator pads provided in the kit made the application process smooth and effortless.
Overall, using the Meguiar’s Complete Car Care Kit was a pleasure.
The instructions provided were clear and easy to follow, making the whole car care process seamless and enjoyable.
The results were outstanding, with my vehicle looking beautifully clean, protected, and shiny.
I highly recommend the Meguiar’s Complete Car Care Kit to any car enthusiast or owner looking for a convenient and effective solution to maintain their vehicle’s appearance.
Reasons To Like
- Comprehensive Solution
- Professional-Level Results
- Trusted Brand
Reasons to Avoid
- Price Consideration
- Product Variation
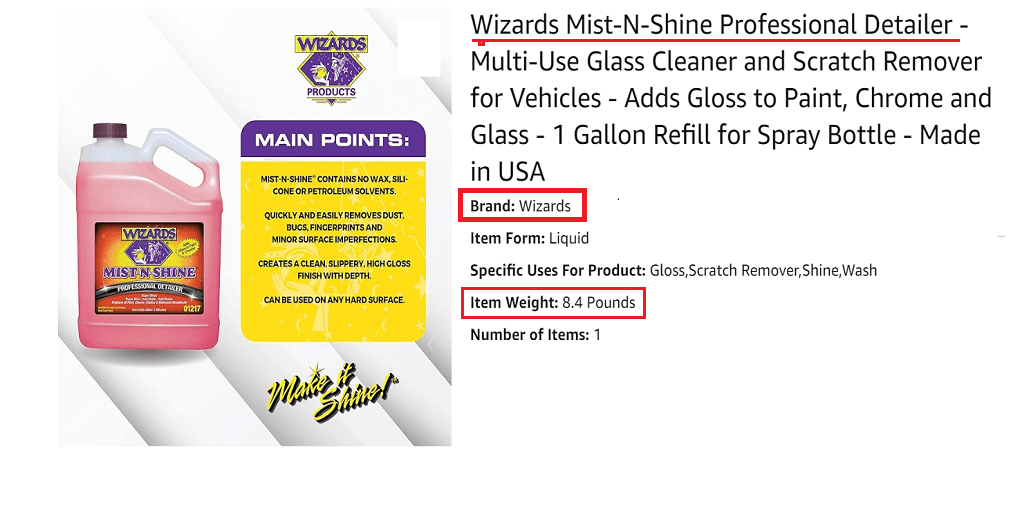
5. Wizards Mist-N-Shine Professional Detailer
“Wizards Mist-N-Shine Professional Detailer” is a popular automotive detailing product known for its ability to provide a quick and easy way to enhance the appearance of vehicles.

It is often used by automotive enthusiasts, professional detailers, and car owners who want to achieve a glossy, showroom-quality finish on their vehicles. Here’s an overview of this product and its key features:
Key Benefits
-
Convenient Spray Bottle for Easy Application -
Suitable for Use on All Types and Colors of Vehicles -
Helps to Maintain a Glossy, Showroom-Quality Finish -
Offers a cost-effective option for those seeking a complete car care solution -
Repels Water, Keeping Your Vehicle Cleaner for Longer -
Safe and Effective on Painted Surfaces -
Leaves No Residue or Streaks Behind -
Ideal for Last-Minute Touch-Ups Before Car Shows or Events -
Protects Against Harmful UV Rays That Can Cause Paint Fading -
Compatible with Various Types of Microfiber Cloths or Applicator Pads -
Can Be Used in Direct Sunlight or Shade
User Experience
I recently had the opportunity to use “Wizards Mist-N-Shine Professional Detailer” on my beloved car, and the experience was nothing short of impressive.
As a car enthusiast who takes pride in maintaining the appearance of my vehicle, I was eager to put this product to the test. Here’s my firsthand experience:
One of the standout features of Mist-N-Shine is its effortless application. Armed with the convenient spray bottle, I could easily apply the product to various surfaces of my car,
including the paint, glass, and chrome. Whether I was working in direct sunlight or shade, the spray application was consistent and smooth.
In the days that followed, I observed that my car remained cleaner for longer periods between washes. Mist-N-Shine seemed to have a dust and dirt-repellent quality, keeping my car looking freshly cleaned even in the midst of daily driving.
What truly stood out about this experience was the time-saving aspect. Mist-N-Shine allowed me to achieve a pristine shine and finish in a matter of minutes, perfect for last-minute touch-ups before car shows or simply maintaining that showroom look.
My experience with Wizards Mist-N-Shine Professional Detailer left me thoroughly satisfied.
It’s become an essential part of my car care routine, allowing me to effortlessly maintain my vehicle’s appearance and keep it looking its best with minimal effort.
When choosing a car window cleaner, there are several factors that you should consider to ensure you select the right product for your needs. Here are some important factors to keep in mind:
Streak-free formula
Look for a car window cleaner that specifically states it provides a streak-free finish.
This feature ensures that your windows will be left clear and transparent, without any unsightly streaks or residue.
Safe for tinted windows
If your vehicle has tinted windows, make sure the cleaner you choose is safe to use on these surfaces. Some window cleaners contain ingredients that can damage or discolor tinted windows,
so opt for one that specifically mentions its compatibility with tinted glass.
Non-ammonia formula
Ammonia-based cleaners can be harsh and damaging to certain types of window tint and plastic surfaces.
It’s advisable to select a car window cleaner with a non-ammonia formula to prevent any potential damage or discoloration.
Versatility
Consider whether you want a window cleaner that is specifically designed for automotive use or one that can also be used for household purposes.
Some cleaners offer versatility and can be used on various glass surfaces, including windows, mirrors, and glass tabletops.
Ease of use
Look for a car window cleaner that is easy to apply and wipe off. Spray bottles provide convenience and control,
allowing for even application of the cleaner. Consider whether you prefer a spray bottle or a wipe-on application method.
Residue-free finish
Choose a window cleaner that leaves a residue-free finish.
Residue can attract dust and dirt, making your windows appear dirty even after cleaning. A residue-free formula will help maintain the cleanliness of your windows for a longer period.
Anti-fog properties
Some car window cleaners come with anti-fog properties, which prevent fogging on the inside of the windows.
If you live in an area with high humidity or frequently experience foggy windows, this feature can be beneficial.
Tips for Effective Car Window Cleaning
Cleaning your car windows may seem like a simple task, but with the right techniques, you can achieve a streak-free and sparkling result.
Here are some tips for effective car window cleaning:
- Choose the right time and place: It’s best to clean your car windows in a shaded area or on a cloudy day. Sun exposure might cause the cleaning solution to dry fast, resulting in streaks.
Also, avoid cleaning your windows when the surface is too hot as it can cause the cleaner to evaporate too quickly. - Gather the necessary supplies: Have all your window cleaning supplies ready before you begin.
You will need a quality glass cleaner, microfiber towels or lint-free cloths, and a spray bottle if applicable. - Start with the interior: Begin by cleaning the interior of the windows first. This helps prevent any dirt or cleaning solution from transferring onto the exterior glass during the process.
Use the glass cleaner and a clean cloth to wipe the windows in a circular motion, ensuring complete coverage. - Move to the exterior: Once the interior is done, move on to the exterior windows. Spray the glass cleaner onto the window surface and quickly spread it using a clean cloth or sponge. Work in small sections to prevent the cleaner from drying before wiping.
- Wipe in the right motion: To avoid streaks, use a horizontal motion on the interior and a vertical motion on the exterior. This way, if there are any streaks, you can easily identify which side they are on. Additionally, using different motions on the interior and exterior reduces the chances of missing any spots.
- Dry with a microfiber towel: Once you’ve wiped the glass cleaner off the windows, use a dry microfiber towel to remove any remaining moisture. Microfiber towels are gentle on the glass and reduce the chances of streaking or leaving lint behind.
- Spot check and touch up: After you finish cleaning, take a step back and inspect the windows for any missed spots or streaks. If you notice any, simply spray a small amount of glass cleaner onto a cloth and touch up those areas.
Spray vs. wipe-on application: Pros and cons of each method
Spray and wipe-on application methods are two common ways to apply car window cleaners. Both methods have their own pros and cons, so it’s important to consider your preferences and specific cleaning needs. Here are the pros and cons of each method:
Spray Application
Pros:
- Convenience: Spray bottles offer convenient and quick application. They allow for easy and even distribution of the cleaning solution onto the window surface.
- Control: With a spray bottle, you have better control over the amount of cleaner applied. This can help prevent excessive use and wastage.
- Wide coverage: Spray application covers a larger area with each spray, making it efficient for cleaning multiple windows or larger car surfaces.
Cons:
- Overspray: When using a spray bottle, there is a risk of overspray onto surrounding surfaces, such as the dashboard or upholstery. Care must be taken to avoid contact with sensitive areas.
- Uneven application: If not sprayed evenly, there is a possibility of uneven distribution of the cleaner, leading to streaks or missed spots.
- Drying time: The cleaner may dry quickly upon contact with the glass surface, making it harder to achieve a streak-free finish if not wiped off promptly.
Wipe-On Application
Pros:
- Precision: Wipe-on application allows for more precise targeting of specific areas or problem spots on the window. It provides more control over where the cleaner is applied.
- No overspray: With wipe-on application, the risk of cleaner inadvertently ending up on other surfaces is minimal. This makes it a suitable method for cleaning interior windows.
Cons:
Uneven Coverage: Wipe-on application can sometimes lead to uneven coverage, resulting in areas with too much product and others with too little. This can affect the overall appearance and effectiveness of the application.
Time-Consuming: Wipe-on application can be more time-consuming compared to other application methods, especially for larger surfaces. It requires careful attention and multiple passes to ensure thorough coverage.
Benefits of Using a Waterless Car Window Cleaner
Using a waterless car window cleaner offers several benefits, making it a convenient and efficient option for maintaining clean and streak-free windows. Here are some of the key benefits:
Water conservation
One of the primary advantages of using a waterless car window cleaner is its ability to clean without the need for excessive water usage. Traditional car washing methods can consume a significant amount of water.
By using a waterless cleaner, you can conserve water and minimize the environmental impact of your car maintenance routine.
Convenience and time-saving
Waterless car window cleaners are designed to be quick and easy to use. They eliminate the need for water buckets, hoses, and drying time. With a simple spray and wipe, you can effectively clean your car windows in a fraction of the time required for traditional washing methods.
This convenience is particularly useful in situations where access to water is limited, such as in parking garages or when on the go.
Versatility
Waterless car window cleaners are often formulated to be multi-purpose, allowing them to be used on various surfaces other than just windows. They can safely clean mirrors, chrome trim, and other glass surfaces in your vehicle, providing a convenient all-in-one solution.
Streak-free finish
High-quality waterless car window cleaners are designed to provide a streak-free finish. They contain specialized cleaning agents that effectively lift and remove dirt, grime, and fingerprints without leaving residue or streaks behind. This ensures that your windows remain crystal-clear and free from unsightly streaks.
Portability
Waterless car window cleaners come in compact and portable packaging, making them easy to carry in your car or take with you on road trips or camping adventures. This allows for on-the-spot cleaning whenever you need it, without the need to locate a water source or car wash facility.
How to clean the windows with spary-step by step guide
Certainly! Here’s a step-by-step guide on how to clean windows using a spray-on glass cleaner:
Materials Needed:
- Sprayway Streak Free Glass Cleaner Spray or your preferred glass cleaner
- Microfiber cleaning cloth or lint-free paper towels
- Two clean, dry microfiber cloths (one for wiping, one for buffing)
- Bucket of water (optional, for rinsing the cloth)
Step 1: Gather Supplies
Gather all the materials you’ll need, including the glass cleaner, microfiber cloths, and a bucket of water if you plan to rinse the cloth.
Step 2: Prepare the Glass Cleaner
Shake the Sprayway Streak Free Glass Cleaner Spray well to ensure proper mixing of the solution. Make sure the spray nozzle is functioning properly.
Step 3: Test a Small Area
Before applying the glass cleaner to the entire window, test it on a small, inconspicuous area to ensure compatibility and check for any adverse reactions.
Step 4: Spray the Glass Cleaner
Maintain a distance of 6-8 inches between the spray bottle and the glass surface. Begin at the top and work your way down the window. Spray an even mist of the glass cleaner over the entire window.
Step 5: Wipe the Glass
Immediately after spraying, take a clean microfiber cloth or lint-free paper towel and start wiping the glass in a horizontal or vertical motion. Use light pressure and smooth, overlapping strokes to remove dirt, grime, and smudges.
Step 6: Pay Attention to Corners and Edges
Pay extra attention to the corners, edges, and window frames where dirt tends to accumulate. Use the edge of the cloth to reach tight spaces.
Step 7: Buff to a Streak-Free Finish
Take a second clean, dry microfiber cloth and use it to buff the glass surface in the same direction you wiped it. Buffing helps remove any remaining streaks or residue, leaving a crystal-clear finish.
Step 8: Inspect the Results
Inspect the window for any lingering streaks, smudges, or spots. If necessary, repeat steps 4 to 7 to achieve the desired level of cleanliness.
Step 9: Rinse and Wring the Cloth (Optional)
If you’re using a damp cloth and a bucket of water for rinsing, rinse the cloth thoroughly and wring it out before proceeding with wiping and buffing the glass.
Step 10: Clean the Exterior
If you’re cleaning the exterior windows, repeat steps 4 to 9 for each window, ensuring that you work efficiently to prevent the glass cleaner from drying before wiping.
Step 11: Finish and Enjoy
Stand back and admire your freshly cleaned, streak-free windows. Enjoy the improved clarity and aesthetics they bring to your vehicle.
Remember to always follow the manufacturer’s instructions and guidelines for the specific glass cleaner you’re using. Additionally, avoid cleaning windows in direct sunlight or when the glass is hot to the touch, as this can cause the cleaner to evaporate too quickly and lead to streaking.
Importance of Regularly Cleaning Car Windows
Regularly cleaning car windows is essential for several reasons:
- Safety: Dirty or smudged windows can obstruct your view while driving, reducing visibility and increasing the risk of accidents. Regular cleaning ensures clear and unobstructed views, allowing you to see clearly and react to any potential hazards on the road.
- Enhances driving experience: Clean windows provide a more pleasant driving experience. They allow natural light to enter the vehicle, making the interior feel brighter and more spacious. Additionally, clean windows offer a clearer view of the surroundings, enhancing the overall enjoyment of your driving experience.
- Aesthetics: Well-maintained windows contribute to the overall appearance of your vehicle. Clean windows give the vehicle a polished and well-cared-for look, improving its visual appeal and potentially increasing its resale value.
- Longevity of window components: Regular cleaning helps prevent the buildup of dirt, grime, and stubborn stains on the windows. Over time, accumulated debris can cause damage to the window seals, hinges, and mechanisms.
By keeping the windows clean, you can help extend the lifespan of these components. - Protects tinted windows: If your vehicle has tinted windows, regular cleaning helps maintain the appearance and integrity of the tint. Accumulated dirt and debris can cause the tint to discolor or peel off over time.
By cleaning the windows regularly, you can prevent such damage and ensure the tinted windows look their best for longer. - Resale value: When it comes time to sell or trade in your vehicle, clean windows can make a positive impression on potential buyers.
A well-maintained vehicle, including clean windows, is more likely to fetch a higher resale value compared to one that appears neglected or poorly cared for.
Common mistakes to avoid while cleaning car windows
While cleaning car windows, it’s important to avoid common mistakes that can lead to streaks, residue, or damage. Here are some mistakes to avoid:
Using the wrong cleaner
Avoid using household glass cleaners or ammonia-based cleaners on car windows. These can leave behind streaks or damage tinted windows. Opt for a specifically formulated car window cleaner instead.
Cleaning in direct sunlight
When cleaning automobile windows in direct sunshine, the cleaning solution dries fast, leaving streaks. Find a shaded area or choose a cloudy day to clean your windows effectively.
Using the wrong cloth
Avoid using paper towels, newspapers, or abrasive materials to clean your car windows.
These can leave lint, scratch the glass, or cause streaks. Instead, use microfiber towels or lint-free cloths that are gentle on the glass surface.
Not cleaning the edges and corners
Don’t forget to clean the edges and corners of the car windows. Dirt and residue tend to accumulate in these areas, leading to a less than satisfactory finish. Use a cloth or cotton swab to reach and clean these tight spots.
Overspraying the cleaner
Avoid spraying an excessive amount of cleaner on the windows. Overspraying can result in dripping and excessive moisture, which can lead to streaks and make the cleaning process more difficult.
Wiping in a circular motion
While applying the cleaner, avoid wiping in a circular motion.
Circular wiping can spread the dirt and cleaning solution in a circular pattern, making it harder to achieve a streak-free finish. Instead, use straight vertical or horizontal wiping motions.
Not buffing or drying properly
After cleaning, make sure to thoroughly buff the windows with a dry microfiber cloth or towel. This step helps remove any remaining moisture or residue, leaving the windows streak-free and sparkling.
Using a dirty cloth
Using a dirty or previously used cloth can reintroduce dirt and debris onto the window surface. Always use a clean cloth or towel when cleaning car windows to avoid this issue.
Best Car Window Cleaning Tools and Accessories
When it comes to cleaning your car windows, having the right tools and accessories can make the task easier and more effective. Here are some of the best car window cleaning tools and accessories:
Microfiber cloths
Microfiber cloths are essential for cleaning car windows.
They are highly absorbent, lint-free, and gentle on glass surfaces, ensuring a streak-free finish. Look for high-quality microfiber cloths that are specifically designed for cleaning windows.
Squeegee
A squeegee is a handy tool for removing excess water and cleaning solution from car windows.
It helps to achieve a streak-free finish by quickly and efficiently removing moisture.
Look for a squeegee with a comfortable handle and a soft rubber blade for smooth and effective drying.
Spray bottle
A spray bottle is a useful accessory for applying water or cleaning solution onto car windows. Look for a durable spray bottle with an adjustable nozzle to control the mist or spray pattern. This allows for even and controlled application of the cleaning solution.
Glass cleaner
Invest in a high-quality glass cleaner specifically formulated for car windows. Look for one that is streak-free, non-ammonia-based, and safe to use on tinted windows. It’s essential to choose a cleaner that effectively removes dirt, grime, and fingerprints without leaving residue or streaks behind.
Detailing brush
A detailing brush with soft bristles is useful for cleaning hard-to-reach areas, such as window corners and edges.
It helps to remove dirt and debris from these areas, ensuring a thorough cleaning.
Extension pole
An extension pole can be helpful when cleaning larger vehicles or areas that are difficult to reach, such as the windshield or rear window.
It allows you to extend your reach while cleaning, making the task more comfortable and efficient.
Glass polish
In addition to regular cleaning, using a glass polish periodically helps to remove stubborn stains, water spots,
and light scratches from car windows. Follow the instructions on the glass polish product for the best results.
Conclusion
In conclusion, when it comes to finding the best car window cleaner, there are several important factors to consider. You want a cleaner that provides a streak-free finish, is safe for tinted windows,
and has a non-ammonia formula to prevent damage. Versatility, ease of use, and a residue-free finish are also desirable features.
After researching and analyzing various car window cleaners, it is clear that different products excel in different areas.
However, two standout options that consistently meet the criteria for the best car window cleaner are the Wizards Mist-N-Shine Professional Detailer and the Detail King Sprayway Streak Free Glass Cleaner Spray.
The Wizards Mist-N-Shine Professional Detailer offers an instant and stunning shine to your vehicle. Its versatile application, quick-drying formula,
and protective qualities make it a top choice for both car enthusiasts and professional detailers. Additionally, its non-greasy formula ensures a clean, smooth finish without any residue or streaks.
On the other hand, the Detail King Sprayway Streak Free Glass Cleaner Spray boasts streak-free cleaning, convenience, and non-toxic, eco-friendly composition.
It is safe for tinted windows, provides powerful cleaning action, and leaves a crystal-clear finish. The ease of use, pleasant fragrance, and professional-quality results make it a reliable option.
Frequently Asked Questions (FAQs)
Here are some common questions and answers about cleaning windows with a spray-on glass cleaner:
- How do I choose the right glass cleaner?
When selecting a glass cleaner, look for one that is specifically formulated for automotive use. Opt for products that are streak-free, ammonia-free, and safe for tinted windows. Reading product reviews and recommendations can also help you make an informed choice.
- Can I use a regular cloth to clean windows?
While you can use a regular cloth, it’s recommended to use a microfiber cleaning cloth or lint-free paper towels. These materials are less likely to leave lint or streaks on the glass, ensuring a clearer result.
- Should I clean windows in direct sunlight?
It’s best to avoid cleaning windows in direct sunlight or when the glass is hot to the touch. The heat can cause the cleaning solution to evaporate quickly, leading to streaks. Choose a shaded or cooler area for optimal results.
- How often should I clean my windows?
The frequency of window cleaning depends on your driving conditions and personal preferences. Regular cleaning can help maintain visibility and the overall appearance of your vehicle. Aim to clean windows at least once a month or whenever you notice a buildup of dirt, grime, or smudges.
- Can I use glass cleaner on tinted windows?
Yes, you can use glass cleaner on tinted windows, but ensure that the product is safe for tinted surfaces.
Ammonia-free cleaners are generally recommended for tinted windows to prevent damage to the tint film.
- What if my windows are heavily soiled or have water spots?
For stubborn dirt or water spots, you may need to use a specialized glass polish or a gentle abrasive cleaner designed for glass surfaces. Follow the manufacturer’s instructions and test in a small area first.
- Can I use the same cloth for wiping and buffing?
It’s advisable to use separate cloths for wiping and buffing. This helps ensure that you achieve a streak-free finish during the buffing process,
as any remaining residue from the cleaning stage may transfer to the glass during buffing.
Reasons To Like
- Effortless Application
- Enhanced Gloss
- UV Protection:
Reasons to Avoid
- Limited Cleaning
- Not a Replacement for Washing
6. BugSlide 64 Oz Cleaner Refill for Spray Bottles & Travel Kits
The BugSlide 64 oz Cleaner Refill for Spray Bottles & Travel Kits is a convenient and cost-effective solution for removing bugs, dirt, and grime from various surfaces.

This refill size is specifically designed to replenish your BugSlide spray bottles and travel kits, ensuring you always have enough cleaning solution on hand.
Key Benefits
-
The cleaner is specially created to provide a streak-free and spotless finish -
It efficiently removes road tar, grease, and other tough substances -
The BugSlide 64 Oz Cleaner Refill is incredibly user-friendly -
Simply pour the required amount into your spray bottle or travel kit -
The refillable spray bottle allows you to control the amount of cleaner dispensed -
BugSlide is suitable for motorcycles, cars, boats, RVs, and even household items like mirrors and glass surfaces. -
This protective coating makes future cleaning sessions less time-consuming and prevents dirt buildup -
The long-lasting protection ensures your vehicle maintains its shine and is shielded from environmental elements
User Experience
BugSlide 64 Oz Cleaner Refill for Spray Bottles & Travel Kits has been my go-to cleaning product for many years now, and I must say that my experience with it has been nothing short of exceptional.
From its efficient cleaning capabilities to its practicality, this product has surpassed my expectations time and again.
One of the standout features of BugSlide 64 Oz Cleaner Refill is its impeccable cleaning power. Whether it’s removing dirt, grime,
or even stubborn bug residue from my vehicles or other surfaces, this cleaner gets the job done effortlessly. Its formula is powerful enough to remove tough stains without causing any damage to the paint or delicate surfaces.
have witnessed its ability to restore shine and gloss to my vehicles, leaving them looking as good as new.
After using BugSlide 64 Oz Cleaner Refill for Spray Bottles & Travel Kits for several years, I can confidently say that it has become an indispensable part of my cleaning routine.
Its efficient cleaning power, versatility, long-lasting performance, and commitment to safety make it a standout product in the market.
Reasons To Like
- Economical and Eco-Friendly
- Efficient Bug and Grime Removal
- Protective Barrier
Reasons to Avoid
- Scent Sensitivity
- Surface Compatibility
7. BugSlide 1 Gallon / 128 Oz Cleaner Refill for Spray Bottles & Travel Kits
The BugSlide 1 Gallon / 128 Oz Cleaner Refill for Spray Bottles is a convenient and economical solution for refilling your BugSlide spray bottles.

This larger size ensures you have an abundant supply of BugSlide cleaner, allowing you to clean multiple vehicles or surfaces without worrying about running out.
Key Benefits
-
Ample quantity ensures you have a generous supply of BugSlide cleaner -
BugSlide is designed to effectively remove bugs, road grime, dirt, and debris from various surfaces -
Suitable for use on motorcycles, cars, trucks, RVs, bicycles, and more -
Suitable for use on motorcycles, cars, trucks, RVs, bicycles, and more -
Leaves behind a protective, water-repellent barrier that helps prevent future bug residue buildup -
Formulated to deliver a streak-free and polished appearance -
BugSlide’s effective formula reduces the need for vigorous scrubbing -
BugSlide’s effective formula reduces the need for vigorous scrubbing
User Experience
I recently had the opportunity to use the BugSlide 1 Gallon / 128 Oz Cleaner Refill for Spray Bottles & Travel Kits, and it has been a game-changer in my cleaning routine.
Here’s my user experience with this fantastic product:
The BugSlide cleaner proved to be highly effective in removing bugs, road grime, and tough stains. Whether it was on windshields, painted surfaces,
chrome, fiberglass, plastic, or acrylics, BugSlide performed admirably, leaving surfaces clean, shiny, and residue-free.
I was truly impressed with its cleaning power and ability to tackle even stubborn contaminants.
The versatility of BugSlide cleaner was another standout feature. I used it on my motorcycle, car, and even on my RV, and it delivered excellent results on all surfaces.
It made my vehicles look spotless and restored their original shine. The convenience of using one cleaner for multiple surfaces added an additional level of simplicity to my cleaning routine.
In conclusion, the BugSlide 1 Gallon / 128 Oz Cleaner Refill for Spray Bottles & Travel Kits has exceeded my expectations.
Its abundant supply, powerful cleaning abilities, versatility, cost-effectiveness, and user-friendly nature have made it an essential part of my cleaning routine.
I highly recommend BugSlide cleaner to anyone in need of a superior cleaning solution for their vehicles and surfaces.
Reasons To Like
- Cost-Effective Solution
- Convenient Travel Kits
- Effective Cleaning Performance
Reasons to Avoid
- Bulk Storage Requirement
- Travel Kit Limitations
8. Wizards Mist-N-Shine Professional Detaile
Wizards Mist-N-Shine Professional Detailer is a high-quality automotive detailing product designed to bring out the lustrous shine of your vehicle while providing exceptional protection.
This advanced formula is favored by car enthusiasts and professionals alike for its ability to quickly rejuvenate the appearance of various surfaces, from paintwork to glass and chrome
Key Benefits
-
Achieve a deep, reflective shine with a quick and easy application. -
Polymer molecules form a protective barrier for longer-lasting shine and protection. -
Suitable for various surfaces including paint, clear coats, chrome, glass, and plastic trim. -
Effortlessly streamline your detailing process with quick application and removal. -
Guards against harmful UV rays to prevent fading and deterioration over time. -
Reduces dust attraction, keeping surfaces cleaner for an extended period. -
Convenient spray-on formula for hassle-free use. -
Leaves behind a subtle and enjoyable scent after application. -
Trusted by car enthusiasts and professionals for showroom-quality finishes. -
Revitalize the overall look of your vehicle with a stunning, glossy finish. -
Helps maintain the color and integrity of paint, plastics, and other materials. -
Versatile enough to cover various surfaces, reducing the need for multiple products.
User Experience
I recently had the opportunity to use the Wizards Mist-N-Shine Professional Detailer on my car, and I must say, it exceeded my expectations in terms of performance and convenience.
Here’s my user experience with this fantastic product:
Firstly, the Mist-N-Shine Professional Detailer provided an instant and stunning shine to my vehicle.
The glossy finish it left behind was unparalleled, with a deep, rich luster that made my car look like it just rolled out of the showroom.
It truly enhanced the overall appearance and made my vehicle stand out.
The Mist-N-Shine Professional Detailer exhibited excellent versatility. I was able to use it on various surfaces of my car, including the painted surfaces, chrome accents, and even the glass.
It worked effectively on all of them, producing consistent results across the board. This versatility made it a convenient choice for me, as I didn’t have to switch between different products for different surfaces.
The Wizards Mist-N-Shine Professional Detailer delivered outstanding results and made the process of enhancing the appearance of my vehicle a breeze.
Its ability to provide an instant shine, versatility, ease of use, protective qualities, and non-greasy formula make it an excellent choice for car enthusiasts and professional detailers alike.
I highly recommend the Wizards Mist-N-Shine Professional Detailer to anyone looking for a reliable and high-performing product for their vehicle’s detailing needs.
Reasons To Like
- Instant Shine
- Versatility
- Time-Saving Application
Reasons to Avoid
- Dependency on Frequent Application
- Potential for Overuse
- Limited Longevity
9. Detail King Sprayway Streak Free Glass Cleaner Spray
Detail King Sprayway Streak Free Glass Cleaner Spray is a premium automotive glass cleaner designed to provide unparalleled clarity and cleanliness to your vehicle’s windows and mirrors.

Renowned for its streak-free formula and exceptional performance, this glass cleaner is a favorite among car enthusiasts and professionals alike.
Key Benefits
-
Ammonia-free formula ensures safe cleaning without harming delicate glass surfaces. -
Achieve crystal-clear windows and mirrors without unsightly streaks or smudges. -
Spray-on application simplifies the cleaning process for quick and convenient use. -
Suitable for various glass surfaces, from automotive windows to household mirrors. -
Repels dust and particles, helping to keep glass surfaces cleaner for longer periods. -
Leaves no residue behind, maintaining the pristine appearance of your glass. -
Elevates the overall appearance of your vehicle by providing clear and sparkling glass. -
Pleasant Fragrance: Leaves a subtle and enjoyable fragrance, enhancing the cleaning experience.
User Experience
I recently had the opportunity to use the Detail King Sprayway Streak Free Glass Cleaner Spray, and I must say,
it exceeded my expectations when it comes to cleaning glass surfaces. Here’s my user experience with this fantastic product:
The versatility of this glass cleaner spray was another standout feature. I was able to use it on various surfaces, including glass windows, mirrors, and even windshields.
This made it a convenient choice for cleaning all the glass surfaces in my home and car. It saved me the hassle and expense of purchasing separate cleaners for different applications.
I was impressed with the powerful cleaning action of this glass cleaner. It quickly and effectively dissolved and lifted tough stains, making the cleaning process much easier and more efficient.
It effortlessly tackled dirt, dust, fingerprints, and even smudges, leaving my glass surfaces sparkling clean.
Reasons To Like
- Ammonia-Free Formula
- Quick and Easy Application
Reasons to Avoid
- Limited Specialty
10. Invisible Glass 91164-2PK Auto and Home Cleaner
When it comes to maintaining the cleanliness and clarity of your car’s windows and household surfaces, the Invisible Glass 91164-2PK Auto and Home Cleaner stands out as a reliable solution.
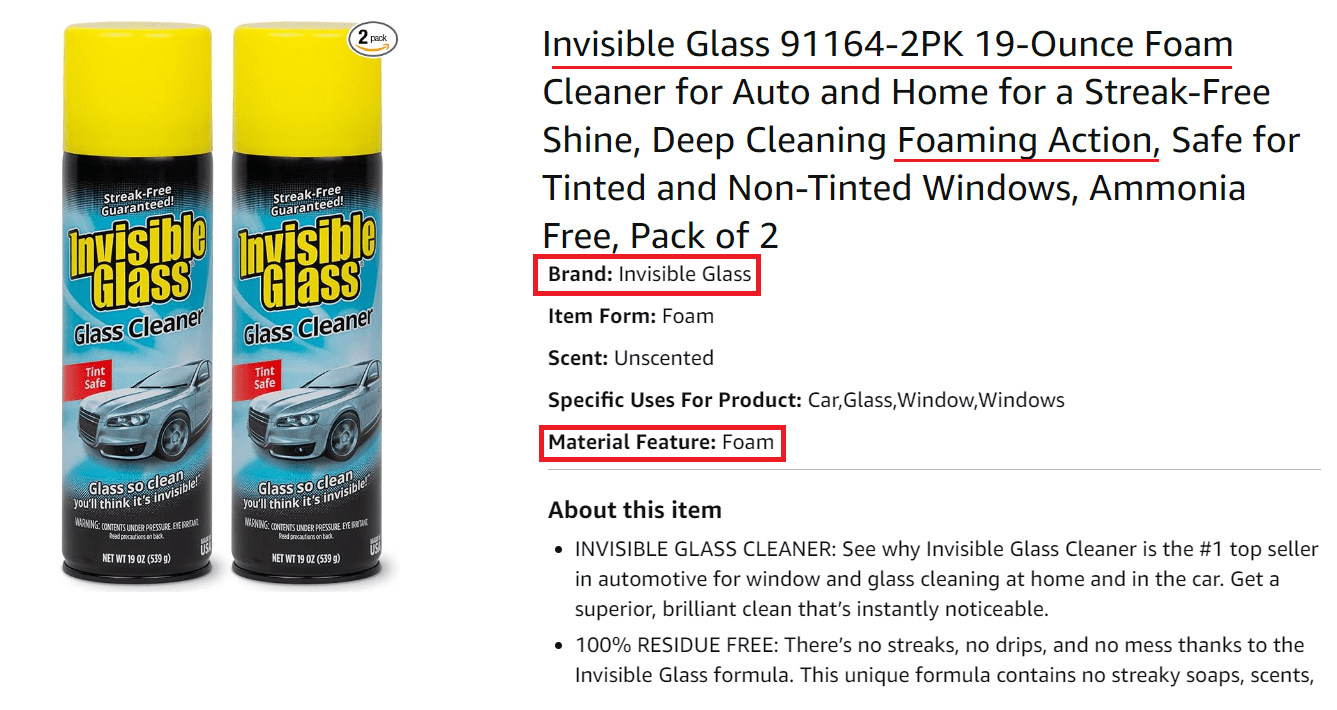
This advanced cleaning product promises to bring a new level of transparency to your glass surfaces, offering streak-free brilliance both inside your vehicle and throughout your living spaces.
In this review, we’ll explore the features, benefits, and effectiveness of the Invisible Glass 91164-2PK Auto and Home Cleaner.
Key Benefits
-
Suitable for cars, trucks, motorcycles, and even recreational vehicles, ensuring clear visibility across your entire fleet. -
The cleaner tackles water spots left by rain or sprinklers, restoring glass surfaces to their original shine. -
Use it to maintain the clarity of glass decorations, picture frames, and glass tabletops for an immaculate look. -
By removing contaminants that can corrode glass over time, the cleaner helps prolong the life of your glass surfaces. -
The compact and travel-friendly size of the spray bottle makes it easy to carry in your car or keep on hand at home. -
Clear and clean glass reduces glare from sunlight and artificial lighting, contributing to safer driving and comfortable living. -
The cleaner won’t interfere with the functionality of defoggers and defrosters on automotive glass surfaces. -
Clean windows and mirrors allow natural light to flow freely, brightening up your living spaces and creating a welcoming atmosphere.
User Experience
The Invisible Glass 91164-2PK Auto and Home Cleaner is a popular cleaning product known for its effectiveness in providing a streak-free and crystal-clear finish to glass surfaces.
Users have reported positive experiences with this cleaner, highlighting the following features:
The Invisible Glass cleaner is designed to remove dirt, grime, fingerprints, and other residues from glass surfaces without leaving streaks behind.
It is specifically formulated to deliver optimal clarity and transparency.
This cleaner is versatile, capable of effectively cleaning both automotive glass, such as windshields and windows, and household glass surfaces like mirrors and windows.
It is convenient for use in different areas of your home and vehicle.
The Invisible Glass cleaner is known for its residue-free formula, which means it doesn’t leave any soapy or oily residues on the glass surfaces after cleaning.
This helps to maintain a clean and clear appearance without any unwanted streaks or smudges.
Users have found that the cleaner is easy to apply. It can be sprayed directly onto the glass surface and wiped clean with a microfiber cloth or paper towel.
The quick-drying formula saves time and ensures efficient cleaning.
The Invisible Glass cleaner is reputed to be safe for use on various types of glass surfaces, including tinted windows.
It is free from ammonia, so it does not cause any damage or discoloration. Users have reported achieving excellent results without any adverse effects.
Overall, based on user experiences, the Invisible Glass 91164-2PK Auto and Home Cleaner is known for delivering streak-free results, versatility, and
an easy application process, making it a popular choice for cleaning glass surfaces in both automotive and household settings.
Reasons To Like
- Streak-Free Brilliance
- Versatile Application
- Quick and Effortless Cleaning
Reasons to Avoid
- Scent Sensitivity
- Surface Compatibility
- Eco-Friendly Impact
11. Zep Ammonia Free Glass Cleaner Concentrate
The Zep Ammonia-Free Glass Cleaner Concentrate is a dependable option for attaining immaculate and sparkling glass surfaces.
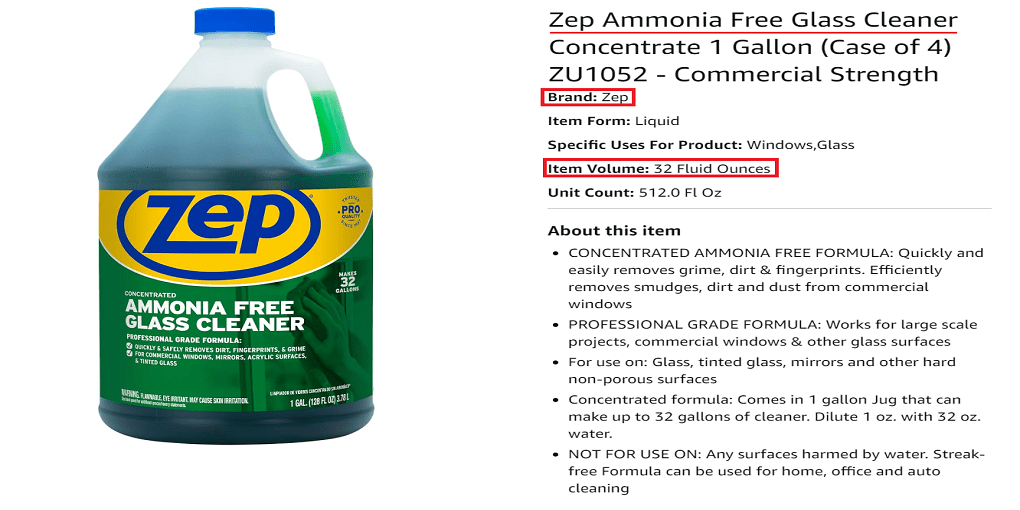
This sophisticated cleaning concentrate promises gleaming windows and mirrors without the harshness of ammonia.
In this review, we’ll look at the Zep Ammonia-Free Glass Cleaner Concentrate’s features, benefits, and effectiveness.
Key Benefits
-
Enhances visibility for safer driving and clear views. -
Dilutes for cost-effective cleaning. -
Covers a significant area with a single bottle. -
Safe for use on various surfaces, including chrome and plastic. -
Won’t damage delicate surfaces due to its non-abrasive nature. -
Delivers results akin to commercial cleaning services. -
Elevates your cleaning routine with consistent, high-quality outcomes. -
Aligns with eco-friendly cleaning solutions. -
Minimizes environmental impact without compromising effectiveness. -
Easily dilutes with water for customized cleaning strength. -
Simple application using a spray bottle and microfiber cloth. -
Simple application using a spray bottle and microfiber cloth.
User Experience
Ammonia-free glass cleaners, like the Zep Glass Cleaner Concentrate, are formulated to effectively clean glass surfaces without the use of ammonia.
While I can’t provide specific user experiences with this particular product, I can outline the potential benefits and features you might find:
The absence of ammonia in the cleaner makes it a safer option for cleaning glass surfaces, especially on materials that may be sensitive to ammonia-based products.
This reduces the risk of damage, discoloration, or etching.
Ammonia-free glass cleaners are typically designed to provide streak-free results.
They aim to effectively remove fingerprints, smudges, dirt, and grime from glass surfaces without leaving behind any residue or streaks.
Many ammonia-free glass cleaners can be used on various glass surfaces, such as windows, mirrors, glass tables, and shower doors.
This versatility allows you to use the cleaner in different areas of your home or vehicle.
Glass cleaner concentrates, like the Zep Glass Cleaner Concentrate, often offer value for money as they can be diluted with water according to the recommended ratios specified by the manufacturer.
This allows you to customize the strength of the solution based on your cleaning needs.
Ammonia-free glass cleaners are typically easy to apply. You can either spray the solution directly onto the glass surface or use a damp cloth or sponge to apply it.
Wipe away the cleaner with a clean, lint-free cloth or paper towel for optimal results.
It’s important to follow the specific instructions provided by the manufacturer for the Zep Ammonia Free Glass Cleaner Concentrate or any other glass cleaner you use.
This will ensure you achieve the best results and avoid any potential issues on the surface being cleaned.
Reasons To Like
- Ammonia-Free Cleaning
- Streak-Free Brilliance
- Versatile Application
Reasons to Avoid
- Limited Scent Options
- Surface Compatibility
- Dilution Required
12. Chemical Guys HOL124 Starter Car Care & Cleaning Kit
Introducing the Chemical Guys HOL124 Starter Car Care & Cleaning Kit, a comprehensive solution designed to transform your car care routine.

This all-inclusive kit promises to enhance the appearance and longevity of your vehicle, catering to both car enthusiasts and everyday drivers.
In this review, we’ll delve into the features, benefits, and value of the Chemical Guys HOL124 Starter Car Care & Cleaning Kit.
Key Benefits
-
A comprehensive package that covers various aspects of car care. -
Citrus Wash & Gloss for effective dirt and grime removal while adding a glossy finish. -
Glossworkz Glaze enhances paint depth and shine, masking minor imperfections. -
Butter Wet Wax provides a protective layer with a wet and glossy shine. -
Signature Series Wheel Cleaner targets brake dust and debris on wheels and rims. -
Silk Shine Dressing restores a non-greasy finish to interior and exterior surfaces. -
VRP Super Shine Dressing creates a lasting shine on various surfaces, including tires and rubber. -
Formulations designed for optimal performance and impressive results.
User Experience
Car cleaning kits, like the Chemical Guys HOL124 Starter Car Care & Cleaning Kit, are designed to provide a comprehensive set of products for cleaning and maintaining your vehicle.
While I don’t have specific experiences with this kit, here are some potential benefits you may find based on common features:
Car cleaning kits often include a variety of cleaning products, such as car wash soap, interior cleaners, wheel cleaners, and wax.
This provides you with a range of options to address different areas and surfaces of your car.
The Chemical Guys HOL124 Starter Car Care & Cleaning Kit may offer a complete package with multiple products, tools, and accessories needed for various cleaning tasks.
It can save you time and effort searching for individual cleaning items.
Chemical Guys is a reputable brand known for producing high-quality car care products.
Their cleaning kits often contain professional-grade formulations that deliver effective cleaning results and help maintain your vehicle’s appearance.
With a car cleaning kit, you can have access to specialized products designed for specific surfaces or purposes.
This can result in a more thorough and efficient cleaning process compared to using generic cleaning agents.
It’s important to review the product details, descriptions, and user reviews specifically related to the Chemical Guys HOL124 Starter Car Care & Cleaning Kit you are interested in.
This will help you gauge the experiences of other customers who have used the kit and determine if it meets your specific needs and expectations.
Reasons To Like
- Complete Car Care Solution
- Professional-Quality Results
- Cost-Effective and Time-Saving
Reasons to Avoid
- Product Suitability
- Learning Curve
- Low-Storage Space
13. Boat Bling HS-0128 Hot Sauce Hard Water Spot Remover
Introducing the Boat Bling HS-0128 Hot Sauce Hard Water Spot Remover, a game-changing solution for removing hard water spots from maritime surfaces.
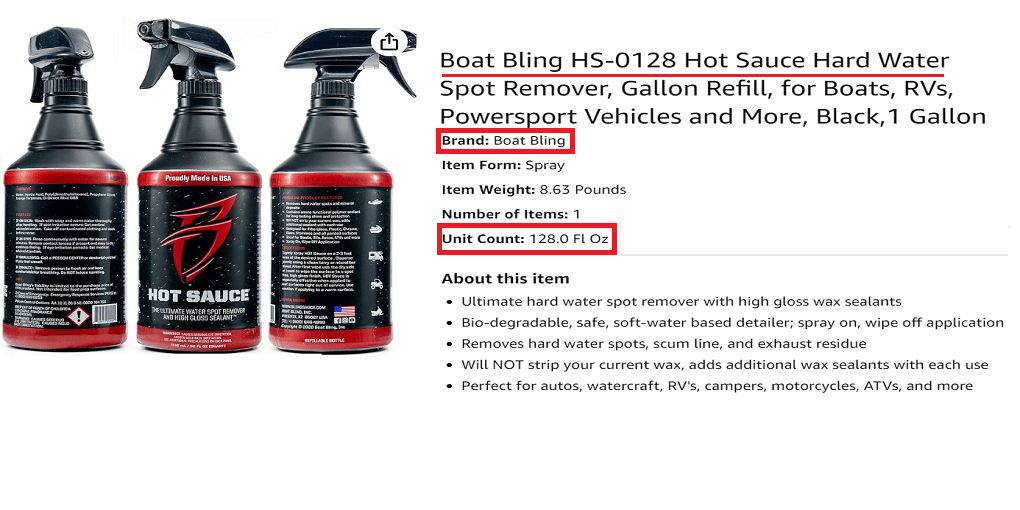
This specialized product promises to renew and restore the brilliance of your vessel, whether you’re a boat owner or a watercraft enthusiast.
In this review,
we’ll look at the Boat Bling HS-0128 Hot Sauce Hard Water Spot Remover’s features, benefits, and effectiveness.
Key Benefits
-
Specifically formulated to effectively dissolve and remove hard water spots from various surfaces. -
Addresses the common challenge of mineral deposits on marine and other surfaces. -
Preserves the integrity of surfaces while restoring their shine. -
Ensures a clean and polished look that reflects in sunlight. -
Simple application process: spray, wait, and wipe away dissolved deposits. -
Leaves a protective barrier on treated surfaces. -
Helps repel water and contaminants, reducing the likelihood of future hard water spots forming. -
Contributes to the preservation of surfaces’ appearance over time. -
Offers a solution for maintaining a well-maintained and attractive vessel. -
Produced by Boat Bling, a reputable name in the marine care industry.
User Experience
The Boat Bling HS-0128 Hot Sauce Hard Water Spot Remover is a popular product used to remove hard water spots and mineral deposits from boats and marine surfaces.
Users have reported positive experiences with this product, highlighting the following features:
The Boat Bling Hot Sauce is specifically formulated to tackle tough hard water spots caused by mineral buildup.
It is designed to dissolve and remove these spots without damaging the surface of the boat or leaving behind residue.
This product can be used on various surfaces, including fiberglass, metal, glass, and plastic.
It is suitable for cleaning boat hulls, windows, chrome fittings, and other parts of the boat that may be affected by hard water spots.
The Hot Sauce is often praised for its user-friendly application process.
It can be sprayed directly onto the affected area, allowed to dwell for a short period of time, and then wiped away with a clean cloth or sponge. Users have found it to be relatively effortless to apply and remove.
In addition to removing hard water spots, some users have noted that the
Boat Bling Hot Sauce can restore the shine and luster to the treated surfaces, leaving them looking clean and rejuvenated.
While individual experiences may vary, the Boat Bling HS-0128 Hot Sauce
Hard Water Spot Remover is generally regarded as an effective and user-friendly solution for removing hard water spots from boats and marine surfaces.
It is recommended to follow the instructions provided by the manufacturer for optimal results.
Before using any cleaning product, it’s always a good idea to test it on a small,
inconspicuous area to ensure compatibility with the surface being treated and to avoid any potential negative effects.
Reasons To Like
- Effective Hard Water Spot Removal
- Gentle on Surfaces
- Versatile Application
Reasons to Avoid
- Specialized Purpose
- Application Process
- Surface Compatibility
Factors to Consider Choosing a Car Window Cleaner
When choosing a car window cleaner, there are several factors that you should consider to ensure you select the right product for your needs. Here are some important factors to keep in mind:
Streak-free formula
Look for a car window cleaner that specifically states it provides a streak-free finish.
This feature ensures that your windows will be left clear and transparent, without any unsightly streaks or residue.
Safe for tinted windows
If your vehicle has tinted windows, make sure the cleaner you choose is safe to use on these surfaces. Some window cleaners contain ingredients that can damage or discolor tinted windows,
so opt for one that specifically mentions its compatibility with tinted glass.
Non-ammonia formula
Ammonia-based cleaners can be harsh and damaging to certain types of window tint and plastic surfaces.
It’s advisable to select a car window cleaner with a non-ammonia formula to prevent any potential damage or discoloration.
Versatility
Consider whether you want a window cleaner that is specifically designed for automotive use or one that can also be used for household purposes.
Some cleaners offer versatility and can be used on various glass surfaces, including windows, mirrors, and glass tabletops.
Ease of use
Look for a car window cleaner that is easy to apply and wipe off. Spray bottles provide convenience and control,
allowing for even application of the cleaner. Consider whether you prefer a spray bottle or a wipe-on application method.
Residue-free finish
Choose a window cleaner that leaves a residue-free finish.
Residue can attract dust and dirt, making your windows appear dirty even after cleaning. A residue-free formula will help maintain the cleanliness of your windows for a longer period.
Anti-fog properties
Some car window cleaners come with anti-fog properties, which prevent fogging on the inside of the windows.
If you live in an area with high humidity or frequently experience foggy windows, this feature can be beneficial.
Tips for Effective Car Window Cleaning
Cleaning your car windows may seem like a simple task, but with the right techniques, you can achieve a streak-free and sparkling result.
Here are some tips for effective car window cleaning:
- Choose the right time and place: It’s best to clean your car windows in a shaded area or on a cloudy day. Sun exposure might cause the cleaning solution to dry fast, resulting in streaks.
Also, avoid cleaning your windows when the surface is too hot as it can cause the cleaner to evaporate too quickly. - Gather the necessary supplies: Have all your window cleaning supplies ready before you begin.
You will need a quality glass cleaner, microfiber towels or lint-free cloths, and a spray bottle if applicable. - Start with the interior: Begin by cleaning the interior of the windows first. This helps prevent any dirt or cleaning solution from transferring onto the exterior glass during the process.
Use the glass cleaner and a clean cloth to wipe the windows in a circular motion, ensuring complete coverage. - Move to the exterior: Once the interior is done, move on to the exterior windows. Spray the glass cleaner onto the window surface and quickly spread it using a clean cloth or sponge. Work in small sections to prevent the cleaner from drying before wiping.
- Wipe in the right motion: To avoid streaks, use a horizontal motion on the interior and a vertical motion on the exterior. This way, if there are any streaks, you can easily identify which side they are on. Additionally, using different motions on the interior and exterior reduces the chances of missing any spots.
- Dry with a microfiber towel: Once you’ve wiped the glass cleaner off the windows, use a dry microfiber towel to remove any remaining moisture. Microfiber towels are gentle on the glass and reduce the chances of streaking or leaving lint behind.
- Spot check and touch up: After you finish cleaning, take a step back and inspect the windows for any missed spots or streaks. If you notice any, simply spray a small amount of glass cleaner onto a cloth and touch up those areas.
Spray vs. wipe-on application: Pros and cons of each method
Spray and wipe-on application methods are two common ways to apply car window cleaners. Both methods have their own pros and cons, so it’s important to consider your preferences and specific cleaning needs. Here are the pros and cons of each method:
Spray Application
Pros:
- Convenience: Spray bottles offer convenient and quick application. They allow for easy and even distribution of the cleaning solution onto the window surface.
- Control: With a spray bottle, you have better control over the amount of cleaner applied. This can help prevent excessive use and wastage.
- Wide coverage: Spray application covers a larger area with each spray, making it efficient for cleaning multiple windows or larger car surfaces.
Cons:
- Overspray: When using a spray bottle, there is a risk of overspray onto surrounding surfaces, such as the dashboard or upholstery. Care must be taken to avoid contact with sensitive areas.
- Uneven application: If not sprayed evenly, there is a possibility of uneven distribution of the cleaner, leading to streaks or missed spots.
- Drying time: The cleaner may dry quickly upon contact with the glass surface, making it harder to achieve a streak-free finish if not wiped off promptly.
Wipe-On Application
Pros:
- Precision: Wipe-on application allows for more precise targeting of specific areas or problem spots on the window. It provides more control over where the cleaner is applied.
- No overspray: With wipe-on application, the risk of cleaner inadvertently ending up on other surfaces is minimal. This makes it a suitable method for cleaning interior windows.
Cons:
Uneven Coverage: Wipe-on application can sometimes lead to uneven coverage, resulting in areas with too much product and others with too little. This can affect the overall appearance and effectiveness of the application.
Time-Consuming: Wipe-on application can be more time-consuming compared to other application methods, especially for larger surfaces. It requires careful attention and multiple passes to ensure thorough coverage.
Benefits of Using a Waterless Car Window Cleaner
Using a waterless car window cleaner offers several benefits, making it a convenient and efficient option for maintaining clean and streak-free windows. Here are some of the key benefits:
Water conservation
One of the primary advantages of using a waterless car window cleaner is its ability to clean without the need for excessive water usage. Traditional car washing methods can consume a significant amount of water.
By using a waterless cleaner, you can conserve water and minimize the environmental impact of your car maintenance routine.
Convenience and time-saving
Waterless car window cleaners are designed to be quick and easy to use. They eliminate the need for water buckets, hoses, and drying time. With a simple spray and wipe, you can effectively clean your car windows in a fraction of the time required for traditional washing methods.
This convenience is particularly useful in situations where access to water is limited, such as in parking garages or when on the go.
Versatility
Waterless car window cleaners are often formulated to be multi-purpose, allowing them to be used on various surfaces other than just windows. They can safely clean mirrors, chrome trim, and other glass surfaces in your vehicle, providing a convenient all-in-one solution.
Streak-free finish
High-quality waterless car window cleaners are designed to provide a streak-free finish. They contain specialized cleaning agents that effectively lift and remove dirt, grime, and fingerprints without leaving residue or streaks behind. This ensures that your windows remain crystal-clear and free from unsightly streaks.
Portability
Waterless car window cleaners come in compact and portable packaging, making them easy to carry in your car or take with you on road trips or camping adventures. This allows for on-the-spot cleaning whenever you need it, without the need to locate a water source or car wash facility.
How to clean the windows with spary-step by step guide
Certainly! Here’s a step-by-step guide on how to clean windows using a spray-on glass cleaner:
Materials Needed:
- Sprayway Streak Free Glass Cleaner Spray or your preferred glass cleaner
- Microfiber cleaning cloth or lint-free paper towels
- Two clean, dry microfiber cloths (one for wiping, one for buffing)
- Bucket of water (optional, for rinsing the cloth)
Step 1: Gather Supplies
Gather all the materials you’ll need, including the glass cleaner, microfiber cloths, and a bucket of water if you plan to rinse the cloth.
Step 2: Prepare the Glass Cleaner
Shake the Sprayway Streak Free Glass Cleaner Spray well to ensure proper mixing of the solution. Make sure the spray nozzle is functioning properly.
Step 3: Test a Small Area
Before applying the glass cleaner to the entire window, test it on a small, inconspicuous area to ensure compatibility and check for any adverse reactions.
Step 4: Spray the Glass Cleaner
Maintain a distance of 6-8 inches between the spray bottle and the glass surface. Begin at the top and work your way down the window. Spray an even mist of the glass cleaner over the entire window.
Step 5: Wipe the Glass
Immediately after spraying, take a clean microfiber cloth or lint-free paper towel and start wiping the glass in a horizontal or vertical motion. Use light pressure and smooth, overlapping strokes to remove dirt, grime, and smudges.
Step 6: Pay Attention to Corners and Edges
Pay extra attention to the corners, edges, and window frames where dirt tends to accumulate. Use the edge of the cloth to reach tight spaces.
Step 7: Buff to a Streak-Free Finish
Take a second clean, dry microfiber cloth and use it to buff the glass surface in the same direction you wiped it. Buffing helps remove any remaining streaks or residue, leaving a crystal-clear finish.
Step 8: Inspect the Results
Inspect the window for any lingering streaks, smudges, or spots. If necessary, repeat steps 4 to 7 to achieve the desired level of cleanliness.
Step 9: Rinse and Wring the Cloth (Optional)
If you’re using a damp cloth and a bucket of water for rinsing, rinse the cloth thoroughly and wring it out before proceeding with wiping and buffing the glass.
Step 10: Clean the Exterior
If you’re cleaning the exterior windows, repeat steps 4 to 9 for each window, ensuring that you work efficiently to prevent the glass cleaner from drying before wiping.
Step 11: Finish and Enjoy
Stand back and admire your freshly cleaned, streak-free windows. Enjoy the improved clarity and aesthetics they bring to your vehicle.
Remember to always follow the manufacturer’s instructions and guidelines for the specific glass cleaner you’re using. Additionally, avoid cleaning windows in direct sunlight or when the glass is hot to the touch, as this can cause the cleaner to evaporate too quickly and lead to streaking.
Importance of Regularly Cleaning Car Windows
Regularly cleaning car windows is essential for several reasons:
- Safety: Dirty or smudged windows can obstruct your view while driving, reducing visibility and increasing the risk of accidents. Regular cleaning ensures clear and unobstructed views, allowing you to see clearly and react to any potential hazards on the road.
- Enhances driving experience: Clean windows provide a more pleasant driving experience. They allow natural light to enter the vehicle, making the interior feel brighter and more spacious. Additionally, clean windows offer a clearer view of the surroundings, enhancing the overall enjoyment of your driving experience.
- Aesthetics: Well-maintained windows contribute to the overall appearance of your vehicle. Clean windows give the vehicle a polished and well-cared-for look, improving its visual appeal and potentially increasing its resale value.
- Longevity of window components: Regular cleaning helps prevent the buildup of dirt, grime, and stubborn stains on the windows. Over time, accumulated debris can cause damage to the window seals, hinges, and mechanisms.
By keeping the windows clean, you can help extend the lifespan of these components. - Protects tinted windows: If your vehicle has tinted windows, regular cleaning helps maintain the appearance and integrity of the tint. Accumulated dirt and debris can cause the tint to discolor or peel off over time.
By cleaning the windows regularly, you can prevent such damage and ensure the tinted windows look their best for longer. - Resale value: When it comes time to sell or trade in your vehicle, clean windows can make a positive impression on potential buyers.
A well-maintained vehicle, including clean windows, is more likely to fetch a higher resale value compared to one that appears neglected or poorly cared for.
Common mistakes to avoid while cleaning car windows
While cleaning car windows, it’s important to avoid common mistakes that can lead to streaks, residue, or damage. Here are some mistakes to avoid:
Using the wrong cleaner
Avoid using household glass cleaners or ammonia-based cleaners on car windows. These can leave behind streaks or damage tinted windows. Opt for a specifically formulated car window cleaner instead.
Cleaning in direct sunlight
When cleaning automobile windows in direct sunshine, the cleaning solution dries fast, leaving streaks. Find a shaded area or choose a cloudy day to clean your windows effectively.
Using the wrong cloth
Avoid using paper towels, newspapers, or abrasive materials to clean your car windows.
These can leave lint, scratch the glass, or cause streaks. Instead, use microfiber towels or lint-free cloths that are gentle on the glass surface.
Not cleaning the edges and corners
Don’t forget to clean the edges and corners of the car windows. Dirt and residue tend to accumulate in these areas, leading to a less than satisfactory finish. Use a cloth or cotton swab to reach and clean these tight spots.
Overspraying the cleaner
Avoid spraying an excessive amount of cleaner on the windows. Overspraying can result in dripping and excessive moisture, which can lead to streaks and make the cleaning process more difficult.
Wiping in a circular motion
While applying the cleaner, avoid wiping in a circular motion.
Circular wiping can spread the dirt and cleaning solution in a circular pattern, making it harder to achieve a streak-free finish. Instead, use straight vertical or horizontal wiping motions.
Not buffing or drying properly
After cleaning, make sure to thoroughly buff the windows with a dry microfiber cloth or towel. This step helps remove any remaining moisture or residue, leaving the windows streak-free and sparkling.
Using a dirty cloth
Using a dirty or previously used cloth can reintroduce dirt and debris onto the window surface. Always use a clean cloth or towel when cleaning car windows to avoid this issue.
Best Car Window Cleaning Tools and Accessories
When it comes to cleaning your car windows, having the right tools and accessories can make the task easier and more effective. Here are some of the best car window cleaning tools and accessories:
Microfiber cloths
Microfiber cloths are essential for cleaning car windows.
They are highly absorbent, lint-free, and gentle on glass surfaces, ensuring a streak-free finish. Look for high-quality microfiber cloths that are specifically designed for cleaning windows.
Squeegee
A squeegee is a handy tool for removing excess water and cleaning solution from car windows.
It helps to achieve a streak-free finish by quickly and efficiently removing moisture.
Look for a squeegee with a comfortable handle and a soft rubber blade for smooth and effective drying.
Spray bottle
A spray bottle is a useful accessory for applying water or cleaning solution onto car windows. Look for a durable spray bottle with an adjustable nozzle to control the mist or spray pattern. This allows for even and controlled application of the cleaning solution.
Glass cleaner
Invest in a high-quality glass cleaner specifically formulated for car windows. Look for one that is streak-free, non-ammonia-based, and safe to use on tinted windows. It’s essential to choose a cleaner that effectively removes dirt, grime, and fingerprints without leaving residue or streaks behind.
Detailing brush
A detailing brush with soft bristles is useful for cleaning hard-to-reach areas, such as window corners and edges.
It helps to remove dirt and debris from these areas, ensuring a thorough cleaning.
Extension pole
An extension pole can be helpful when cleaning larger vehicles or areas that are difficult to reach, such as the windshield or rear window.
It allows you to extend your reach while cleaning, making the task more comfortable and efficient.
Glass polish
In addition to regular cleaning, using a glass polish periodically helps to remove stubborn stains, water spots,
and light scratches from car windows. Follow the instructions on the glass polish product for the best results.
DIY Car Window Cleaner Recipes
Here are a few DIY car window cleaner recipes using common household ingredients. Remember to always test a small, inconspicuous area before applying any cleaner to the entire window to ensure it doesn’t damage the surface or cause streaks.
Vinegar-Based Window Cleaner
Ingredients:
- 1 cup distilled water
- 1 cup white vinegar
Instructions:
- Mix the distilled water and white vinegar in a spray bottle.
- Shake well to ensure the ingredients are thoroughly combined.
- Spray the mixture onto your car windows.
- Wipe the windows with a microfiber cloth or newspaper for a streak-free finish.
Rubbing Alcohol Window Cleaner
Ingredients:
- 1 cup water
- 1 cup rubbing alcohol (isopropyl alcohol)
Instructions:
- Combine the water and rubbing alcohol in a spray bottle.
- Shake the bottle to mix the ingredients.
- Spray the solution onto your car windows.
- Wipe the windows clean with a lint-free cloth or paper towels.
Cornstarch Window Cleaner
Ingredients:
- 2 tablespoons cornstarch
- 1/4 cup white vinegar
- 1/4 cup rubbing alcohol
- 2 cups warm water
Instructions:
- Dissolve the cornstarch in the warm water.
- Add the white vinegar and rubbing alcohol to the cornstarch mixture.
- Stir well to combine all the ingredients.
- Pour the mixture into a spray bottle.
- Spray the solution onto your car windows and wipe clean with a microfiber cloth.
Lemon Juice Window Cleaner
Ingredients:
- 1 cup water
- 1 cup rubbing alcohol
- 1 tablespoon lemon juice
Instructions:
- Mix the water, rubbing alcohol, and lemon juice in a spray bottle.
- Shake the bottle to ensure the ingredients are blended.
- Spray the solution onto your car windows.
- Wipe the windows with a clean cloth or paper towels.
Dish Soap Window Cleaner
Ingredients:
- 2 cups water
- 1/4 cup white vinegar
- 1/2 teaspoon dish soap
Instructions:
- Combine the water, white vinegar, and dish soap in a spray bottle.
- Shake well to mix the ingredients thoroughly.
- Spray the mixture onto your car windows.
- Wipe the windows clean using a lint-free cloth.
Addressing Stubborn Stains and Marks
Stubborn stains and marks on car windows might require a bit more effort to remove. Here are some tips and additional DIY solutions to address those tough stains and marks:
Baking Soda Paste
Ingredients:
- Baking soda
- Water
Instructions:
- Create a paste by mixing baking soda with a small amount of water.
- Apply the paste to the stained areas on the window.
- Gently scrub the stains using a soft cloth or sponge.
- Rinse the window with water and wipe it clean.
Vinegar and Baking Soda Solution
Ingredients:
- 1/2 cup white vinegar
- 1 tablespoon baking soda
- Water
Instructions:
- Mix the white vinegar and baking soda to create a foamy solution.
- Apply the solution to the stained areas.
- Allow it to sit for a few minutes.
- Gently scrub with a soft cloth or sponge.
- Rinse thoroughly with water and wipe the window dry.
Razor Blade Scraper
For tough, stuck-on debris like stickers, paint, or adhesive residue, a razor blade scraper can be used. However, be very cautious when using this method to avoid scratching the glass. Here’s how:
- Wet the area with water or a mild soapy solution.
- Hold the scraper at a slight angle and gently slide it over the stain to lift it off.
- Keep the glass lubricated while using the razor blade to prevent scratching.
- Once the stain is removed, clean the area with a glass cleaner and wipe it dry.
Rubbing Alcohol
- For adhesive residue or sticky marks, rubbing alcohol can be effective.
- Apply a small amount of rubbing alcohol to a soft cloth.
- Gently rub the stained area until the residue loosens.
- Wipe the area clean with a microfiber cloth.
Toothpaste
- Mild abrasive toothpaste can be used to tackle minor stains and marks.
- Apply a small amount of toothpaste to the stained area.
- Gently scrub using a soft cloth or sponge.
- Rinse thoroughly with water and wipe dry.
Steel Wool (Caution)
For extremely stubborn stains, like water spots or heavy buildup, you can use very fine-grade steel wool. However, use this method with caution, as steel wool can scratch the glass if not used carefully.
- Wet the glass with water or a soapy solution.
- Gently scrub the stained area using the steel wool.
- Rinse the glass thoroughly and dry it with a clean cloth.
Cleaning Window Tint Safely
Cleaning window tint requires a gentle touch to avoid damaging the tint film. Here’s how to safely clean window tint:
Choose the Right Cleaning Products
Opt for mild and non-abrasive cleaning products to avoid damaging the tint. Avoid ammonia-based or harsh chemical cleaners, as they can break down the adhesive holding the tint to the window. Look for products labeled as safe for tinted windows.
Gather Your Supplies
- Mild, alcohol-free window cleaner (or a DIY vinegar-based cleaner)
- Microfiber cloths or soft, lint-free towels
- Soft sponge or non-abrasive cleaning pad
- Bucket of lukewarm water
Follow these Steps
Prepare the Cleaning Solution:
Mix a solution of mild window cleaner and lukewarm water. Alternatively, you can use a homemade solution like the vinegar-based cleaner mentioned earlier.
Test a Small Area
Before cleaning the entire window, test the cleaning solution on a small, inconspicuous corner of the tint to make sure it doesn’t cause any adverse reactions.
Gently Wipe the Tinted Surface
Dip a clean, soft cloth into the cleaning solution and wring out any excess liquid. Gently wipe the tinted surface in a back-and-forth or circular motion. Avoid using excessive pressure, as this can damage the tint.
Focus on Stains and Marks
For stubborn stains or marks, use a soft sponge or non-abrasive cleaning pad along with the cleaning solution. Again, be gentle while scrubbing.
Avoid Excessive Moisture
While cleaning, be mindful not to saturate the tint with excess liquid, as it could seep behind the edges and compromise the adhesive. Use a damp cloth, not a dripping one.
Rinse and Dry
After wiping down the tinted surface with the cleaning solution, use a clean, damp microfiber cloth to remove any remaining residue. Then, dry the window with a dry microfiber cloth to prevent water spots.
Regular Maintenance
It’s a good idea to clean your tinted windows regularly to prevent dirt buildup. Regular maintenance helps keep the tint looking clean and vibrant.
Tips:
- Use Microfiber Cloths: Microfiber cloths are gentle and effective at cleaning without scratching the tinted surface.
- Avoid Sharp Tools: Never use razor blades, sharp objects, or abrasive materials on the tint, as they can damage it.
- Avoid Direct Sunlight: It’s best to clean your tinted windows in a shaded area or when the windows are cool to the touch. Cleaning tinted windows when they are hot could cause the cleaning solution to evaporate quickly and leave streaks.
- Be Patient: Take your time when cleaning tinted windows. Gentle and patient cleaning is key to preserving the tint.
Special Considerations for Interior Windows
Interior windows, often referred to as internal or interior glazed windows, can be a unique and stylish addition to a space, providing both aesthetic appeal and functional benefits.
are some special considerations to keep in mind when dealing with interior windows:
- Privacy and Light Control: Depending on the location of the interior window, privacy and light control can be important factors to consider. Frosted or textured glass can offer privacy while still allowing light to filter through.
- If the window is between two spaces that have different lighting needs, consider using blinds, curtains, or other window coverings to control the light as needed.
- Acoustic Isolation: Interior windows might not provide the same level of sound insulation as traditional walls. If you’re creating separate spaces that require different noise levels, consider using thicker or laminated glass to help with soundproofing.
- Frame and Trim: Choosing the right frame and trim for the interior window is important for its functionality and appearance. Wood, metal, or even minimalist frameless designs are possible options. The choice will depend on the desired look and the interior’s design theme.
- Ventilation: If the interior windows are meant to facilitate airflow between rooms, consider their placement to ensure effective ventilation. This can be particularly useful in spaces like kitchens and bathrooms where proper ventilation is important.
- Safety: Safety is paramount, especially if the window is at a height where accidental falls could occur. Consider using tempered or laminated glass, which is designed to break into small, less harmful pieces if shattered. Additionally, ensure that any handles, latches, or mechanisms are secure and child-safe if relevant.
- Functionality: Consider how the window will function within the space. Will it open or remain fixed? If it’s meant to open, ensure that the mechanism is easy to use and won’t cause obstructions in either space.
Follow these Steps to the Best Car Window Cleaner
Cleaning car windows effectively requires the right tools and techniques. Here’s a step-by-step guide to achieving the best results with car window cleaning:
Materials You’ll Need
- Microfiber towels (lint-free)
- Glass cleaner (ammonia-free)
- Water
- Spray bottle (if not using pre-mixed glass cleaner)
- Soft-bristle brush (optional)
- Squeegee (optional)
Steps to folow
- Gather Your Supplies
- Make sure you have all the necessary materials ready before you start.
- Choose the Right Cleaner:
- Use an ammonia-free glass cleaner specifically designed for automotive use. Ammonia can damage tinted windows and certain car materials.
- Park in Shade
- Perform window cleaning in a shaded area to prevent the cleaner from drying too quickly on the glass.
- Prepare the Cleaning Solution:
- If you’re not using a pre-mixed glass cleaner, dilute the glass cleaner with water according to the manufacturer’s instructions. Usually, a 50-50 mix works well.
- Dust and Debris Removal
- Use a soft-bristle brush or a microfiber cloth to gently remove any loose dust and debris from the window surfaces. This step helps prevent scratching during cleaning.
- Spray the Glass Cleaner:
- Spray the glass cleaner onto one window at a time. Start with the windshield and work your way around the car.
- Work in Sections
- To prevent the cleaner from drying before you can wipe it off, work in smaller sections. A common approach is to divide each window into quarters.
- Wipe the Glass
- Use a clean microfiber towel to wipe the glass in a back-and-forth or circular motion. Apply moderate pressure to remove dirt and grime. Continue until the glass feels smooth and clean.
- Edges and Corners
- Pay special attention to the edges and corners of the windows, as these areas can accumulate dirt and cleaning residue. Fold your microfiber towel to a clean section for detailed cleaning.
- Dry and Buff
- Use a dry, clean microfiber towel to buff the glass to a streak-free shine. This step ensures that no residue or streaks remain.
- Interior Windows
- Follow the same steps for cleaning interior windows. However, be cautious not to overspray onto the dashboard, upholstery, or electronic components.
- Squeegee (Optional)
- If you’re comfortable using a squeegee, you can use it after wiping the glass with a microfiber towel. This can help eliminate streaks and achieve a crystal-clear finish.
Tools and Equipment for Efficient Window Cleaning
Efficient window cleaning requires the right tools and equipment to achieve professional-looking results. Here’s a list of tools and equipment that can help you clean windows effectively:
- Squeegee: A high-quality squeegee is essential for streak-free window cleaning. Look for a squeegee with a replaceable rubber blade to ensure optimal performance.
- Microfiber Cloths: Microfiber cloths are great for wiping away cleaning solution and drying the windows without leaving lint or streaks behind.
- Window Cleaning Solution: You can either buy a commercial window cleaning solution or make your own by mixing water and a small amount of dish soap or white vinegar. Avoid using abrasive or harsh chemicals.
- Bucket: A bucket is necessary for holding your cleaning solution and dipping your squeegee and other tools.
- Extension Pole: An extension pole can be attached to your squeegee to reach higher windows without the need for ladders. This enhances both safety and efficiency.
- Scraper or Razor Blade: A scraper or razor blade can be used to remove stubborn debris like paint, stickers, or bird droppings from the windows. Be careful not to scratch the glass, and make sure the glass is wet before using the scraper.
- Ladder: For windows that are out of reach even with an extension pole, a sturdy ladder is essential. Make sure the ladder is set up on a flat surface and is stable before use.
- Window Cleaning Brush: A soft-bristle brush can be used to scrub window frames and tracks, removing dirt and grime.
- Drop Cloths or Tarps: To protect the surrounding area from drips and splatters, lay down drop cloths or tarps under the windows you’re cleaning.
- Safety Gear: Safety should always be a priority. If you’re working at heights, wear appropriate safety gear such as gloves, goggles, and non-slip shoes. For higher windows, consider using a safety harness.
Importance of Regular Window Cleaning
Regular window cleaning is more important than you might realize. It goes beyond just improving the appearance of your property; it offers several practical benefits as well.
Here are some reasons why regular window cleaning is important:
Enhanced Curb Appeal
Clean windows contribute significantly to the overall curb appeal of your home or business. They create a positive first impression for visitors, potential buyers, or clients.
Clean windows can make your property look well-maintained and inviting.
Improved Natural Light
Clean windows allow more natural light to enter your interior spaces. This can have positive effects on mood, productivity, and even energy efficiency. Dirty windows can block sunlight and create a dull and gloomy atmosphere.
Prolonged Window Lifespan
Regular cleaning helps prevent the buildup of dirt, dust, and grime on window surfaces. Over time, these particles can etch into the glass, leading to scratches and permanent damage.
By keeping windows clean, you can extend their lifespan and avoid costly replacements.
Enhanced Energy Efficiency
Dirty windows can affect your home’s energy efficiency. Dust and grime on windows can create a barrier that inhibits the transfer of heat between the inside and outside.
Clean windows allow for better insulation and can contribute to lower energy bills.
Prevention of Corrosion and Oxidation
If your windows have metal frames or components, regular cleaning can help prevent corrosion and oxidation. These processes can be accelerated by the presence of dirt and moisture, leading to deterioration of the window’s structural integrity.
Health and Hygiene
Dirty windows can harbor allergens, mold, and bacteria, especially in the tracks and corners. Regular cleaning helps maintain a healthier indoor environment by removing these potential sources of allergens and irritants.
Clearer View
Clean windows provide a clear and unobstructed view of the outside world. Whether it’s a beautiful landscape, a bustling city, or your own garden, clean windows allow you to enjoy the view without distortion or obstruction.
Maintenance of Hard Water Stains
Over time, hard water stains can accumulate on windows, making them look cloudy and unattractive. Regular cleaning can help prevent the buildup of these stains and make windows look more transparent.
Professional Image
For businesses, clean windows are essential for projecting a professional image. They demonstrate attention to detail and a commitment to maintaining a clean and inviting environment for customers and clients.
Safety and Accessibility
Regular window cleaning often involves inspecting the condition of windows and frames. This can help identify any maintenance issues or structural problems early on, ensuring that your windows are safe and functioning properly.
Addressing Scratches and Swirl Marks
Addressing scratches and swirl marks on various surfaces, such as car paint, furniture, or electronic screens, requires specific techniques and products.
Here are some general steps and tips to help you address these issues effectively:
Assessment and Cleaning
- Inspect the surface under good lighting to identify the extent of the scratches and swirl marks.
- Clean the surface using a mild, pH-balanced car wash soap (for cars) or a suitable cleaning solution (for other surfaces). This helps remove dirt and debris that could further damage the surface during the repair process.
Gather Necessary Supplies
- Microfiber towels or applicator pads.
- Scratch and swirl mark removal products (e.g., rubbing compounds, polishing compounds, scratch removers).
- Polishing machine (buffer) for larger areas (optional).
Addressing Swirl Marks and Light Scratches
- For light swirl marks and minor scratches, you can use a fine polishing compound or scratch remover designed for the specific surface.
- Apply a small amount of the product onto a clean, soft applicator pad or microfiber cloth.
- Work in small sections, applying gentle pressure in circular motions. Avoid applying excessive pressure, as this can worsen the damage.
Deeper Scratches
- Deeper scratches may require a more aggressive approach. Start with a heavier rubbing compound, and gradually switch to lighter products.
- Apply the rubbing compound to the affected area, and use a microfiber towel or foam pad to work the compound in.
Polishing
- After addressing the scratches, switch to a finer polishing compound to restore the surface’s shine and clarity.
- Apply the polishing compound using the same circular motions as before.
- Buff the surface using a clean, soft microfiber cloth to remove any residue and bring out the shine.
Finishing Touches
- Apply a protective wax or sealant to the surface after polishing to protect it from further damage and enhance its appearance.For cars, a quality car wax or sealant will provide a layer of protection against environmental factors.
Prevention
- To prevent future scratches and swirl marks, use proper washing techniques (such as the two-bucket method), high-quality microfiber towels, and soft wash mitts.
- Avoid using abrasive materials or harsh chemicals that can damage the surface.
- Always follow the manufacturer’s instructions on the products you use. If you’re uncomfortable performing these steps yourself,
you might consider seeking professional detailing services, especially for valuable items like cars.
Cleaning Car Mirrors and Reflective Surfaces
Cleaning car mirrors and reflective surfaces is important for maintaining good visibility while driving and ensuring a clean and polished appearance for your vehicle. Cleaning car mirrors and reflective surfaces is important for several reasons:
- Safety: Clean mirrors provide clear visibility of the surroundings while driving. Dust, dirt, and smudges on the mirrors can obstruct your view and increase the risk of accidents. Regular cleaning ensures optimal visibility and promotes safe driving.
- Improved driving experience: Clean and clear mirrors enhance the overall driving experience. It allows you to easily check blind spots, change lanes, park, and maneuver in tight spaces with confidence.
- Prevention of accidents: Clean mirrors help you see oncoming vehicles and pedestrians, reducing the likelihood of accidents. By keeping the mirrors free from dirt and obstructions, you can effectively monitor your surroundings and react quickly to potential hazards.
- Maintaining the effectiveness of reflective surfaces: Mirrors and other reflective surfaces on a car, such as the windshield and windows, can lose their effectiveness if they are dirty or smudged. Regular cleaning helps to maintain their reflective properties, ensuring clear visibility and accurate reflection.
- Preventing scratches and damage: Dust, dirt, and other debris on the mirrors can act as abrasive particles when wiped, potentially scratching or damaging the mirror surface. Regular cleaning helps to remove these particles and prevents any damage to the mirrors.
- Enhanced appearance: Clean and shiny mirrors contribute to the overall aesthetics of the car. Regular cleaning helps to maintain a polished and well-maintained look, improving the overall appearance of the vehicle.
Here are some steps and tips for effectively cleaning these surfaces:
Materials You’ll Need
- Microfiber cloths or lint-free towels
- Glass cleaner or a mixture of water and mild dish soap
- Water
- Rubbing alcohol (optional)
- Cotton swabs (for small and hard-to-reach areas)
Steps:
Gather Materials
- Assemble all the necessary cleaning materials before you start. Make sure your car is parked in a shaded area to prevent the cleaning solution from drying too quickly on the surfaces.
Dust Removal
- Begin by using a dry microfiber cloth to gently remove any loose dust or dirt from the mirrors and other reflective surfaces. This helps prevent scratching when you start cleaning.
Cleaning Solution
- Prepare a cleaning solution using either a commercial glass cleaner or a mixture of water and a few drops of mild dish soap. If using a commercial cleaner, make sure it’s suitable for automotive glass.
Spray and Wipe
- Spray the cleaning solution onto the mirrors and reflective surfaces. Start wiping from the top of the surface and work your way down in a straight, horizontal motion.
- Use a microfiber cloth or lint-free towel to wipe the surface. Avoid circular motions, as they can leave streaks.
Professional Car Detailing for Windows
Professional car detailing for windows involves a thorough and meticulous cleaning and restoration of a vehicle’s windows to enhance their clarity, appearance, and functionality
Clean windows not only contribute to the overall aesthetics of the car but also improve visibility, safety, and the overall driving experience.
Professional car detailing for windows is a specialized service that focuses on thoroughly cleaning and enhancing the appearance of a car’s windows.
Here are some reasons why professional car detailing for windows is beneficial:
Spotless and streak-free finish
Professional detailers have the skills and knowledge to clean car windows without leaving any streaks or smudges. They use high-quality cleaning products and techniques to ensure a spotless and crystal-clear finish.
Removal of stubborn dirt and grime
Car windows are exposed to various contaminants like bird droppings, tree sap, bugs, and road grime, which can be difficult to remove with regular cleaning.
Professional detailers have access to specialized tools and products that can effectively clean and remove even the toughest dirt and grime from windows.
Enhanced visibility and safety
Clean and clear windows provide optimum visibility while driving, ensuring a safer driving experience. Professional detailing removes any haze, film, or debris that may obstruct the driver’s line of sight, improving road safety.
Protection against damage
Professional detailing often includes a window treatment or sealant that adds an extra layer of protection to the glass. This protective barrier helps repel water, dirt, and other contaminants, reducing the chances of damage and prolonging the lifespan of the windows.
Improved aesthetics
Clean, shiny windows significantly enhance the overall appearance of a car. Professional detailers work to make windows look as good as new, contributing to the overall aesthetics and value of the vehicle.
Convenience and time-saving
Car detailing can be a time-consuming and tedious task, especially when it comes to cleaning windows.
Hiring a professional detailer saves time and effort, allowing you to focus on other important tasks while your car’s windows are cleaned and detailed to perfection.
Addressing Common Window Cleaning Mistakes
Keeping your windows clean can enhance the appearance of your home or workplace, but there are common mistakes that people often make when attempting to clean their windows. Addressing common window cleaning mistakes is crucial to ensure efficient and effective cleaning results.
Here are some mistakes to watch out for and how to avoid them:
Using the Wrong Cleaning Solutions
Using the wrong cleaning solutions, such as ammonia-based cleaners on tinted windows or abrasive cleaners on delicate glass, can damage the glass or leave streaks. Always use a mild, non-ammonia, and non-abrasive cleaner that’s suitable for glass.
Cleaning on a Sunny Day
Cleaning windows on a sunny day might cause the cleaning solution to dry quickly, leaving streaks and residue behind. It’s better to clean windows on a cloudy day or during cooler parts of the day to avoid this issue.
Using Too Much Cleaning Solution
Using excessive cleaning solution can lead to streaks and residue. A little goes a long way. Apply the solution sparingly and evenly.
Not Rinsing Properly
Failing to rinse the windows thoroughly after cleaning can leave behind a soapy residue that attracts dirt and dust. Make sure to rinse the windows with clean water and wipe them dry.
Using the Wrong Tools
Using paper towels or abrasive materials to clean windows can cause scratches. Instead, use a soft, lint-free microfiber cloth or a squeegee for effective cleaning.
Skipping Regular Cleaning
Waiting too long between cleaning sessions can allow dirt and grime to accumulate, making the cleaning process more difficult. Aim to clean your windows regularly to prevent buildup.
Not Dusting First
Dust and debris on the window surface can lead to streaks when cleaned. Prior to using any cleaning solution, dust the windowsill, frame, and glass to remove loose dirt.
Washing Windows in the Wrong Order
Cleaning windows from top to bottom can cause dirty water to drip onto areas you’ve already cleaned. Start from the top and work your way down to avoid this issue.
Ignoring Window Frames and Sills
Cleaning only the glass and neglecting the frames and sills can make the entire window look dirty. Wipe down the frames and sills with a damp cloth as well.
Using Dirty Tools
Using a dirty cloth or squeegee can transfer dirt and grime back onto the window. Make sure your cleaning tools are clean before using them.
Not Drying Thoroughly
After cleaning, make sure to dry the windows completely to prevent streaks. A dry microfiber cloth can help eliminate any remaining moisture.
Tips for cleaning windows in cold weather
Cleaning windows in cold weather can be a bit more challenging, but with the right approach, you can still achieve clean and streak-free results. Here are some tips for cleaning windows during cold weather:
- Choose the Right Day: Pick a day when the temperature is above freezing but not too cold. Cleaning windows when it’s extremely cold can cause the cleaning solution to freeze quickly, leading to streaks and an inefficient cleaning process.
- Use a Suitable Cleaning Solution: In colder temperatures, traditional cleaning solutions might freeze or evaporate too quickly.
Consider using a winter-specific window cleaner or adding a bit of rubbing alcohol to your regular cleaning solution.
Rubbing alcohol helps lower the freezing point of water and aids in faster drying. - Warm Up Cleaning Tools: If possible, warm up your cleaning tools before using them. For instance,
you can soak your microfiber cloth or sponge in warm water for a few minutes before cleaning. This can help prevent freezing and ensure smoother cleaning. - Work in Sections: Since cleaning solution can dry quickly in cold weather, work in smaller sections to prevent the solution from evaporating before you have a chance to clean it off.
- Apply the Solution Sparingly: Use a light mist of the cleaning solution rather than saturating the glass.
This reduces the chances of the solution freezing before you have a chance to wipe it off. - Use a Squeegee: A squeegee is a great tool for cold weather window cleaning as it quickly removes cleaning solution and water from the glass. Make sure to wipe the squeegee blade with a dry cloth after each pass.
- Avoid Direct Sunlight: If it’s sunny but cold, avoid cleaning windows in direct sunlight. The sunlight can cause the cleaning solution to dry too quickly, leaving streaks behind.
- Dry Thoroughly: After cleaning each section, use a dry and clean microfiber cloth to quickly wipe away any moisture or residue. This helps prevent streaks and ensures a clean finish.
- Work from Top to Bottom: Just like in warmer weather, start cleaning at the top of the window and work your way down. This prevents dirty water from dripping onto cleaned areas.
- Pay Attention to Frames: During cold weather, window frames and sills can also accumulate dirt and grime. Take the time to clean and dry these areas as well.
- Consider Indoor Cleaning: If the weather is extremely cold or windy, you might opt for cleaning the inside of the windows first. This way, you can focus on the outside when the weather improves.
Innovations in Car Window Cleaning Technology
Car window cleaning technology has seen several innovations over the years to make the process more efficient, effective, and convenient. Some notable innovations include:
Hydrophobic Coatings
Some car manufacturers have started applying hydrophobic coatings to car windows. These coatings repel water, making it less likely for water droplets to stick to the glass.
This not only improves visibility during rain but also reduces the need for frequent cleaning.
Self-Cleaning Glass
Researchers have been developing self-cleaning glass technologies that use special coatings or materials to break down dirt and grime when exposed to sunlight.
These coatings can help keep car windows cleaner for longer periods, reducing the need for manual cleaning.
Ultrasonic Cleaning Systems
Ultrasonic cleaning systems use high-frequency sound waves to create microscopic vibrations on the glass surface. These vibrations help to dislodge dirt particles, making it easier to wipe them away.
Some car wash facilities and cleaning products use ultrasonic technology to enhance the effectiveness of window cleaning.
Nanotechnology
Nanocoatings and nanomaterials have been employed in car window cleaning.
These materials create a thin protective layer on the glass surface that repels water, dirt, and even oils. Nanotechnology can also provide anti-scratch properties, making car windows more resilient to wear and tear.
Smart Windshield Wipers
Modern windshield wiper systems have become more sophisticated.
Some models come with rain sensors that can automatically adjust the wiper speed based on the intensity of rainfall. Additionally, heated wiper blades can help prevent ice buildup in colder climates, improving overall visibility.
Microfiber Technology
Microfiber materials are widely used for cleaning car windows due to their superior cleaning and absorption properties. These soft and lint-free fabrics can effectively remove dirt and grime without leaving streaks or scratches on the glass.
Augmented Reality (AR) Displays
Some car manufacturers are integrating AR displays into windshields. These displays can provide real-time information such as navigation directions, speed,
and alerts directly on the windshield, reducing the need for the driver to look away from the road and potentially minimizing distractions.
Cleaning Windows of Classic and Vintage Cars
Cleaning the windows of classic and vintage cars requires extra care to avoid causing any damage. Here are some tips to keep in mind:
- Use the right tools: Choose soft, non-abrasive materials to clean the windows. Microfiber cloths or soft, lint-free towels are good options. Avoid using paper towels or rough materials that can scratch the glass.
- Choose a gentle cleaner: Use a mild, automotive glass cleaner specifically designed for windows. Avoid using household cleaners that may contain harsh chemicals that could damage the glass or surrounding trim.
- Test on a small area: If you’re unsure about the compatibility of a cleaner with the glass, it’s best to test it on a small, inconspicuous area first. This will help ensure that the cleaner doesn’t cause any unwanted effects, such as streaking or discoloration.
- Work in shade or cooler temperatures: Cleaning windows in direct sunlight can cause the cleaning solution to dry quickly and result in streaks or spots. It’s best to work in a shaded area or when the car is cool to avoid this issue.
- Use a gentle technique: Gently wipe the glass in straight, horizontal or vertical motions. Avoid applying excessive pressure, as this may scratch the glass. If there are stubborn stains, let the glass cleaner sit for a few moments before wiping.
- Pay attention to window seals and trim: Take care not to overspray the cleaner onto rubber seals or trim as it can cause discoloration or damage. If any cleaner does come into contact with these areas, wipe it off immediately.
- Dry with a lint-free cloth: After cleaning, use a dry, lint-free cloth to buff the windows and remove any remaining streaks or moisture.
Storing and Organizing Car Cleaning Supplies
Storing and organizing car cleaning supplies is essential to keep them easily accessible, in good condition, and prevent any spillage or damage. Here are some tips to help you:
- Dedicated storage space: Designate a specific area for storing your car cleaning supplies. This can be a cabinet, shelf, or even a portable storage container.
- Categorize and separate: Organize your cleaning supplies into categories such as glass cleaners, interior cleaners, exterior cleaners, brushes, microfiber cloths, etc. Use containers or dividers to keep these categories separate, making it easier to locate specific items.
- Use clear containers: Transparent containers or bins allow you to see the contents at a glance, making it easier to find what you need without rummaging through everything. Consider using stackable containers to maximize space.
- Properly label containers: Labeling each container or bin will help you quickly identify what is stored inside. You can use adhesive labels or markers to indicate the contents of each container.
- Secure lids and caps: Make sure all lids, caps, and sprayers are tightly secured to prevent leakage or spills. This will also help maintain the quality of the cleaning products.
- Store in a cool, dry place: High temperatures or humidity can affect the integrity and effectiveness of cleaning products. Store your supplies in a cool, dry area away from direct sunlight or extreme temperature fluctuations.
- Consider hanging options: Some cleaning tools like brushes or dusters can be hung on hooks or pegboards to save space and keep them easily accessible.
- Regularly check expiration dates: Pay attention to the expiration dates of cleaning products and dispose of any that are past their prime. This will ensure that you are using effective and safe products.
- Keep safety in mind: If you have young children or pets, store your supplies in a secure location out of their reach to prevent accidents.
Environmentally Friendly Car Window Cleaners
Using environmentally friendly car window cleaners is a great choice for reducing your ecological footprint while keeping your vehicle’s windows clean and clear. Here are some tips and options for eco-friendly car window cleaning:
Homemade Solutions
You can make your own natural window cleaner using simple ingredients like water, vinegar, and eco-friendly dish soap. Mix these ingredients in a spray bottle, shake well, and apply to your car windows. This solution is effective and safe for the environment.
Commercial Eco-Friendly Cleaners
There are several eco-friendly car window cleaners available on the market. Look for products that are labeled as biodegradable, non-toxic, and made from plant-based ingredients. These cleaners often come in recyclable or eco-friendly packaging.
Microfiber Cloths
Instead of disposable paper towels or synthetic cleaning pads, use microfiber cloths for wiping and polishing your car windows. Microfiber is highly effective at capturing dirt and grime without the need for chemical cleaners.
Waterless Cleaners
Waterless car window cleaners come in the form of sprays or wipes that require minimal or no water for cleaning. They are particularly useful for areas with water restrictions and are usually formulated to be environmentally friendly.
Avoid Ammonia and Harsh Chemicals
Traditional window cleaners often contain ammonia and other harsh chemicals that can be harmful to the environment. Choose products that are ammonia-free and avoid those with toxic ingredients.
Sustainable Practices
When cleaning your car windows, choose shaded or cooler areas to prevent rapid evaporation of cleaning solutions. This will help you use less cleaner and reduce waste.
Proper Disposal
When you’re done cleaning, avoid letting the cleaning solution or rinse water flow into storm drains or natural water bodies. Dispose of them properly by using a sink or drainage system that leads to wastewater treatment.
Professional Detailing Services
If you prefer professional cleaning, consider using eco-friendly car detailing services that use environmentally conscious products and practices.
Cleaning Windows in Commercial and Fleet Vehicles
Cleaning windows in commercial and fleet vehicles requires efficient methods and products to maintain visibility and safety while minimizing environmental impact. Here are some tips for cleaning windows in commercial and fleet vehicles:
Use Eco-Friendly Cleaning Products
Opt for environmentally friendly, biodegradable, and non-toxic cleaning products. Many commercial eco-friendly cleaners are formulated for effective window cleaning without harming the environment.
Microfiber Cloths and Squeegees
Microfiber cloths are excellent for cleaning windows as they capture dirt and grime effectively. Squeegees can also be useful for large windows. Both tools reduce the need for excessive paper towels and waste.
Waterless Solutions
Waterless window cleaning products can be very useful for fleet vehicles. These solutions require minimal water and reduce the risk of water runoff pollution.
Regular Maintenance
Establish a regular cleaning schedule to prevent dirt and grime buildup on windows. This not only ensures good visibility but also reduces the effort required for cleaning.
Safe Access and Equipment
For larger commercial vehicles, use appropriate safety equipment to reach high windows safely. Use platforms, ladders, or extendable tools to ensure the safety of the person performing the cleaning.
Multi-Surface Cleaners
Look for multi-surface cleaners that can effectively clean both glass and interior surfaces, reducing the number of different products needed.
Interior Cleaning
Don’t neglect the interior windows of fleet vehicles. Use interior-safe cleaning products and methods to maintain clear visibility for drivers and passengers.
Avoid Direct Sunlight
Choose shaded or cooler areas for cleaning to avoid rapid evaporation of cleaning solutions. This prevents streaks and helps you use cleaning solutions more efficiently.
Proper Disposal
Dispose of cleaning solutions and rinse water responsibly, avoiding storm drains or natural water bodies. Follow local regulations for proper waste disposal.
Professional Services
For larger fleets or when time is a constraint, consider hiring professional vehicle cleaning services. Many professional detailers offer eco-friendly cleaning options.
Train Your Team
If you have a team responsible for maintaining fleet vehicles, provide proper training on eco-friendly cleaning practices and product usage to ensure consistent and effective results.
Monitor Environmental Impact
Keep track of the environmental impact of your cleaning practices, including product usage and waste generation. This information can help you make further improvements.
Understanding the benefits of hydrophobic coatings
The primary benefit of hydrophobic coatings is their ability to repel water. When applied to a surface, these coatings create a thin layer that causes water to bead up and roll off the surface, preventing water from pooling or spreading.
Improved Visibility
In automotive applications, hydrophobic coatings on windows and windshields can greatly improve visibility during rain or wet conditions. Water droplets bead up and are quickly swept away by the wind, leading to clearer views for drivers.
Reduced Water and Dirt Adhesion
Hydrophobic coatings create a non-stick surface that makes it difficult for dirt, dust, and other contaminants to adhere to the treated surface. This makes surfaces easier to clean and reduces the frequency of cleaning.
Ease of Cleaning
Surfaces treated with hydrophobic coatings are easier to clean because dirt and debris are less likely to stick. A simple rinse or wipe is often enough to remove most contaminants, reducing the need for harsh cleaning agents.
Longer Lasting Surfaces
Hydrophobic coatings can extend the lifespan of surfaces by protecting them from moisture-related damage, such as corrosion, rust, and staining. This is particularly valuable for outdoor and metal surfaces.
Reduced Ice Formation
In colder climates, hydrophobic coatings can help reduce the formation of ice on surfaces such as windows, roofs, and outdoor equipment. The water-repellent nature of the coating prevents ice from adhering as strongly.
Enhanced UV Protection
Some hydrophobic coatings offer UV protection, which can help prevent fading, cracking, and deterioration of surfaces exposed to sunlight.
Anti-Graffiti Properties
In urban environments, hydrophobic coatings can deter graffiti artists. The water-repellent surface makes it more difficult for paint and markers to adhere, making cleanup easier.
Energy Efficiency
In architectural applications, hydrophobic coatings on windows and glass surfaces can help improve energy efficiency. They reduce the amount of heat transferred through windows, leading to potential energy savings in heating and cooling.
Aesthetic Enhancement
Hydrophobic coatings can enhance the appearance of surfaces by giving them a glossy, polished look. They can also prevent water spots and streaks on surfaces like vehicles and glass.
Environmental Benefits
Some hydrophobic coatings are formulated to be eco-friendly and can contribute to water conservation by reducing water usage during cleaning and maintenance.
Avoiding fingerprints and smudges on interior glass
Fingerprints and smudges on interior glass surfaces can be unsightly and reduce visibility. Here are some tips to help you avoid fingerprints and smudges on interior glass:
- Clean Hands: Start with clean hands before touching glass surfaces to minimize the transfer of oils and dirt.
- Use Microfiber Cloths: Microfiber cloths are excellent for cleaning glass surfaces and reducing the likelihood of leaving behind streaks and smudges. Keep a microfiber cloth in your car or around the house for quick cleaning.
- Avoid Direct Contact: Whenever possible, avoid touching glass surfaces with your hands. Use handles or designated touch points instead.
- Frequent Cleaning: Regularly clean interior glass surfaces to prevent the buildup of oils and dirt that can lead to smudges. A quick wipe-down once a week can make a noticeable difference.
- Use Glass Cleaner Sparingly: When using glass cleaner, apply it directly to the cloth rather than spraying it directly on the glass. Excess liquid can lead to streaks and smudges.
- Buff in Circles: When cleaning, use circular motions with the microfiber cloth to evenly distribute the cleaning solution and lift away smudges.
- Dry with a Second Cloth: After cleaning with a damp cloth, use a dry microfiber cloth to buff the glass and remove any remaining moisture or cleaning residue.
- Avoid Ammonia-Based Cleaners: Ammonia-based cleaners can leave streaks on glass surfaces. Opt for ammonia-free glass cleaners or use homemade solutions with vinegar and water.
- Mindful Product Selection: Choose glass cleaners that are formulated specifically to leave no streaks or residue. Look for products labeled as streak-free.
- Ventilation: Ensure proper ventilation when cleaning glass. Cleaning solutions can create a hazy residue if not properly ventilated.
- Be Gentle: Apply gentle pressure when wiping glass surfaces. Excessive pressure can spread oils and create streaks.
- Interior Protection: Consider using interior window treatments that repel dirt and oils, such as hydrophobic coatings or anti-static treatments.
- Protective Barriers: In areas prone to frequent contact, consider using transparent protective films or covers that can be easily cleaned or replaced.
- Regular Maintenance: Establish a routine for cleaning interior glass surfaces. The more frequently you clean, the easier it will be to prevent stubborn smudges from building up.
Window Cleaning for Off-Road and Adventure Vehicles
Window cleaning for off-road and adventure vehicles can be a bit more challenging due to the dirt, dust, and grime that these vehicles often encounter.
However, with the right approach and tools, you can keep the windows of your off-road or adventure vehicle clean and clear. Here’s a guide to help you:
Gather Supplies:
- Microfiber cloths: These are gentle on glass surfaces and help prevent scratching.
- Glass cleaner: Choose a cleaner designed for automotive glass to avoid streaking.
- Water: A bucket of water for rinsing.
- Soft-bristle brush: Use this for removing heavy dirt and grime.
- Squeegee: A squeegee helps to remove excess water and cleaner from the windows.
Rinse First:
- Before applying any cleaner, rinse the windows with water to remove loose dirt and debris. This helps prevent scratching when you start cleaning.
Use a Soft Brush:
- If the windows are particularly dirty, gently scrub them using a soft-bristle brush or a wash mitt. This will help remove stubborn dirt without scratching the glass. Make sure the brush is clean and free of debris that could scratch the glass.
Apply Glass Cleaner:
- Spray the glass cleaner evenly onto the window. Avoid using too much cleaner, as excess liquid can lead to streaks.
Wipe with Microfiber Cloth:
- Use a microfiber cloth to wipe the glass cleaner in a horizontal or vertical motion. Start from the top and work your way down. Microfiber cloths are effective at picking up dirt and leaving a streak-free finish.
Detail Edges and Corners:
- Pay attention to the edges and corners of the windows, as dirt can accumulate there. Use a clean, dry microfiber cloth to detail these areas.
Squeegee for Excess Water:
- If you’re in an area with limited water availability, use a squeegee to remove excess water and cleaner from the windows. Start at the top and pull the squeegee down in a straight line.
Dry and Buff:
- Use a dry microfiber cloth to buff the windows to a shine. This helps remove any remaining streaks or water spots.
Ensuring Child and Pet Safety During Window Cleaning
Ensuring child and pet safety during window cleaning is of utmost importance. Cleaning windows often involves the use of cleaning solutions, tools, and sometimes ladders, all of which can pose potential risks to curious children and pets. Here’s how you can prioritize safety:
1. Choose Safe Cleaning Products
Opt for non-toxic and child-safe cleaning products. Look for products that are labeled as safe for children and pets. Avoid using harsh chemicals that can be harmful if ingested or come into contact with skin.
2. Secure the Area
Keep children and pets away from the cleaning area. Use safety gates or barriers to prevent access to the cleaning site, especially if you’re working indoors. This ensures they won’t accidentally knock over cleaning supplies or get in the way of your work.
3. Child and Pet Supervision
If you’re cleaning windows outdoors or in a space where children and pets have access, designate a responsible adult to supervise them at all times. This ensures they don’t approach the cleaning area or interact with cleaning tools.
4. Lock Windows and Doors
Before you begin cleaning, make sure all windows and doors are locked to prevent children or pets from opening them while you work. This eliminates the risk of them falling out or getting into potentially dangerous situations.
5. Use Non-Slip Ladders and Step Stools
If you need to use a ladder or step stool to reach high windows, ensure that it’s stable and has non-slip feet. Always place the ladder on a level surface and have someone hold the base if possible. Keep children and pets away from the ladder.
6. Store Tools Safely
Store cleaning tools and supplies out of reach when not in use. Sharp or small objects can be dangerous if children or pets get hold of them.
7. Minimize Distractions
Concentrate on your window cleaning task without distractions. If you’re watching children or pets at the same time, your attention could be divided, increasing the risk of accidents.
8. Educate Children and Train Pets
Teach children about the importance of staying away from cleaning areas and explain the potential dangers. Train pets to respond to commands that keep them away from cleaning activities.
9. Ventilate the Area
If you’re using cleaning products with mild odors, make sure the area is well-ventilated to prevent any adverse effects on children or pets.
10. Use Cordless Tools
If you’re using corded tools like vacuum cleaners, be cautious of the cords. They can pose tripping hazards to both children and pets. Opt for cordless tools when possible.
Cleaning Windows with Electric Heating Elements
Cleaning windows with electric heating elements, such as those found in rear window defrosters or heated side mirrors, requires a bit of caution to avoid damaging the elements or affecting their functionality. Here’s how you can clean windows with electric heating elements safely:
1. Turn Off the Heating Elements
Before you begin cleaning, make sure to turn off any electric heating elements on the windows, such as rear defrosters or heated side mirrors. This helps prevent accidental damage to the elements or potential shock hazards.
2. Choose the Right Cleaning Products
Opt for gentle and non-abrasive cleaning products to avoid scratching the glass or damaging the heating elements. Use a glass cleaner specifically designed for automotive use.
3. Test in a Small Area
If you’re using a new cleaning product, it’s a good idea to test it on a small and inconspicuous area of the glass first. This ensures that the product doesn’t adversely affect the heating elements or cause any damage.
4. Use Soft Tools
When cleaning around the electric heating elements, use soft materials like microfiber cloths or soft sponges. Avoid using abrasive scrubbers or brushes that could scratch the glass or damage the elements.
5. Avoid Excessive Pressure
When wiping the glass, avoid applying excessive pressure on the heating elements. Gently wipe around them to prevent accidentally dislodging or damaging the elements.
6. Pat Dry
If the windows are wet, such as after rain or washing, gently pat dry around the heating elements using a clean, dry microfiber cloth. Avoid vigorous rubbing that could damage the elements.
7. Detailing
Use a smaller, soft microfiber cloth to detail around the heating elements and edges. This ensures that no water or cleaning solution is left on the glass or the elements.
8. Check for Damage
After cleaning, visually inspect the heating elements to ensure they are still intact and undamaged. If you notice any issues, it’s best to consult a professional before using the heating elements.
9. Avoid Excessive Heat
After cleaning, allow the window to air dry before turning the heating elements back on. Sudden temperature changes, such as applying heat to a wet window, could potentially damage the elements.
10. Regular Maintenance
Keep the windows clean and free from dirt or debris to avoid excessive buildup around the heating elements. Regular cleaning can help prevent issues over time.
Window Cleaning Frequency and Maintenance
The frequency of window cleaning and maintenance depends on various factors, including the environment, weather conditions, the type of vehicle, and personal preferences. Here are some guidelines to help you determine how often to clean and maintain the windows of your off-road or adventure vehicle:
- Environment: If you frequently drive in dusty, muddy, or off-road conditions, your windows will likely get dirtier more quickly. In such cases, you might need to clean your windows more often.
- Weather Conditions: Rain, snow, and other weather conditions can leave streaks and water spots on windows. If you live in an area with frequent rain or experience seasonal changes, you may need to clean your windows more often.
- Regular Maintenance Schedule: Establishing a regular maintenance schedule is a good idea. Cleaning your windows on a weekly or bi-weekly basis can help prevent heavy buildup of dirt and grime, making the cleaning process easier each time.
- After Off-Roading Trips: After every off-roading adventure, it’s recommended to rinse off the dirt and mud from your vehicle, including the windows. This helps prevent debris from drying onto the windows and makes the subsequent cleaning easier.
- Signs of Buildup: Pay attention to signs of dirt, grime, water spots, or reduced visibility on your windows. When you notice these signs, it’s time for a cleaning.
- Seasonal Cleaning: Consider doing a more thorough cleaning at the change of seasons. This could involve removing any built-up residue, cleaning the window seals, and checking for any damage.
- Interior Cleaning: Don’t forget about the interior of the windows. Interior surfaces can accumulate dirt, dust, and fingerprints, affecting visibility. Clean the inside of your windows as often as the outside.
- Use Protective Coatings: Applying hydrophobic or glass-coating products can help repel dirt, water, and grime, making it easier to clean your windows in the future. These coatings can also provide UV protection.
- Inspect for Damage: Regularly inspect the windows for any chips, cracks, or scratches. Addressing these issues promptly can prevent further damage and ensure safety.
- Professional Cleaning: Occasionally, consider getting a professional window cleaning service for a thorough and detailed cleaning. They have the tools and expertise to tackle tough stains and ensure crystal-clear windows.
Cleaning Electric and Hybrid Vehicle Windows
Cleaning the windows of electric and hybrid vehicles follows similar principles to cleaning windows in traditional vehicles, with a few considerations specific to these types of vehicles. Here’s how to clean the windows of electric and hybrid vehicles safely and effectively:
1. Turn Off the Vehicle
Before starting the cleaning process, make sure the vehicle is turned off to prevent any electrical interference or accidental engagement of systems.
2. Choose Suitable Cleaning Products
Opt for automotive glass cleaners that are safe for both regular and tinted windows. Check that the product is compatible with electric and hybrid vehicles to avoid damaging electrical components.
3. Avoid Direct Contact with Charging Ports
If your vehicle has charging ports or electric outlets located near the windows, avoid direct contact with cleaning products in these areas to prevent damage to sensitive components.
4. Clean Window Tint with Caution
If your electric or hybrid vehicle has tinted windows, be extra cautious when cleaning. Use gentle cleaning solutions and soft materials to avoid damaging the tint.
5. Turn Off HVAC Systems
Make sure the heating, ventilation, and air conditioning (HVAC) systems are turned off before cleaning. This prevents airflow from spreading cleaning products into the cabin.
6. Use Soft Microfiber Cloths
Opt for soft, lint-free microfiber cloths for cleaning. These are less likely to scratch the glass and are effective at removing dirt and grime.
7. Wipe in a Gentle Motion
Wipe the windows in a gentle, circular or back-and-forth motion using the microfiber cloth. Avoid using excessive pressure to prevent damaging the glass or electrical components.
8. Clean Both Interior and Exterior Windows
Don’t forget to clean both the interior and exterior windows. Interior surfaces can accumulate fingerprints, dust, and residues from the HVAC system.
9. Focus on Detailing
Pay attention to corners, edges, and window seals, as dirt can accumulate in these areas. Use a smaller microfiber cloth for detailing.
10. Dry Thoroughly
After cleaning, ensure the windows are dried thoroughly to prevent streaks and water spots. Use a clean, dry microfiber cloth to achieve a clear finish.
Extending the Lifespan of Windshield Wipers
Extending the lifespan of windshield wipers can help you maintain good visibility and safety while driving in various weather conditions. Here are some tips to help you maximize the lifespan of your windshield wipers:
Keep Your Windshield Clean: Dirt, debris, and grime on your windshield can cause unnecessary strain on your wiper blades. Regularly clean your windshield to prevent these particles from causing damage to the blades.
Park in the Shade: Ultraviolet (UV) rays from the sun can deteriorate the rubber in wiper blades over time. Whenever possible, park your vehicle in a shaded area to minimize UV exposure.
Use Windshield Washer Fluid: Use a high-quality windshield washer fluid to help lubricate the wiper blades and ensure smooth movement. Avoid using plain water, as it may not provide the necessary lubrication and can freeze in cold weather.
Gently Remove Ice and Snow: If your vehicle is covered in ice or snow, take care when clearing it off. Use a soft brush or your defroster to gently melt the ice before using the wipers. Trying to force wipers over frozen material can damage the blades.
Raise Wipers in Winter: During extremely cold weather, lift the wiper blades away from the windshield to prevent them from freezing to the glass. This can prevent damage when you start your car and turn on the wipers.
Replace Wipers Regularly: Wiper blades naturally degrade over time due to exposure to the elements and constant use. Replace them at least once a year, or as soon as you notice streaking, skipping, or reduced effectiveness.
Clean the Blades: Wipe down the rubber portion of the wiper blades with a clean cloth soaked in warm, soapy water. This can help remove dirt, debris, and any built-up grime that may affect their performance.
Avoid Using Wipers on a Dry Windshield: Running your wipers on a dry windshield can cause unnecessary friction and wear on the blades. Always wet the windshield with washer fluid before using the wipers.
Be Gentle: Avoid using excessive force when using your wipers. Let them do their job naturally, and avoid using them to scrape off stubborn debris.
Regular Maintenance: Keep an eye on the condition of your wiper blades. If you notice any signs of damage or wear, address them promptly. Regularly inspect the wiper arms and ensure they are securely attached.
Exploring Anti-Static Solutions for Cleaner Windows
Static electricity can cause dust and debris to stick to windows, making them appear dirty and reducing visibility. To combat this issue and keep your windows cleaner, you can explore various anti-static solutions and practices. Here are some options:
Anti-Static Cleaning Solutions:
Anti-Static Sprays: These sprays are designed to neutralize static charges and repel dust and particles from surfaces. They can be applied to windows and other surfaces to reduce the attraction of dirt.
Anti-Static Wipes
Specialized anti-static wipes are available that can help remove dust and prevent static buildup on windows and glass surfaces.
Dryer Sheets
Dryer sheets, commonly used in laundry, can also be used to reduce static on windows. Rub a dryer sheet on the glass to reduce static and repel dust.
Humidity Control
Maintain a balanced indoor humidity level, as very dry air can increase static electricity. Using a humidifier can help keep the air moist, reducing static charges.
Grounding
You can use grounding techniques to discharge static buildup. This can be done by touching a grounded metal object, such as a doorknob, before touching the window. This can help prevent static from attracting dust to the surface.
Microfiber Cloths
Microfiber cloths are effective for cleaning windows without leaving streaks. They also have anti-static properties that can help repel dust and prevent static buildup.
Regular Cleaning
Regularly cleaning your windows with a mild, non-ammonia based glass cleaner can prevent dust from accumulating. Cleaning helps eliminate the particles that static charges attract.
Avoid Synthetic Fabrics
When cleaning windows, avoid using synthetic fabrics that can generate static. Instead, opt for natural fiber cloths like microfiber or cotton.
Static-Free Cleaning Tools
Look for cleaning tools specifically designed to be static-free. These tools are made with materials that minimize static buildup.
Keep Surfaces Dry
Moisture can help dissipate static charges. Keeping windows clean and dry can reduce static attraction.
Innovative Solutions for Self-Cleaning Car Windows
Self-cleaning car windows could revolutionize the way we maintain our vehicles and improve visibility while driving. Here are some innovative solutions and technologies that could be used to create self-cleaning car windows:
Hydrophobic Coatings
Applying hydrophobic coatings to car windows can make them water-repellent, causing rainwater to bead up and roll off, taking dirt and grime with it.
This technology already exists and is used in some products, but further advancements could make it more effective and longer-lasting.
Nano-Coatings
Nanotechnology could be utilized to create superhydrophobic and self-cleaning surfaces. Nano-coatings could actively repel water, preventing water droplets from sticking and carrying away dirt particles.
Photocatalytic Coatings
Photocatalytic coatings contain materials that use sunlight to break down organic materials on the glass, such as dirt, grime, and even pollutants. This process could help keep windows cleaner and improve air quality.
Electrodynamic Cleaning
Using an electrodynamic system, a small electrical charge could be applied to the glass, creating an electrostatic field that repels dust and particles. mThis technology could help prevent dirt accumulation on car windows.
Vibration or Ultrasonic Cleaning
Introducing vibrations or ultrasonic waves to the glass could help loosen and remove dirt particles. This concept is inspired by ultrasonic cleaning devices used in various industries.
Microfiber Wipers
Imagine tiny robotic arms with microfiber cloth attachments that could periodically wipe the surface of the windows to remove dirt.
These microfiber wipers could be activated based on sensors that detect the level of dirt buildup.
Transparent Solar Panels
Some research is being done on transparent solar panels that can generate electricity while also repelling dirt and maintaining transparency.
Integrating these panels into car windows could provide both self-cleaning and energy generation benefits.
Self-Healing Materials
Self-healing materials, similar to those being developed for car paint, could also be applied to car windows. These materials can repair minor scratches and damage, helping to keep windows clear.
Windshield Wiper Enhancements
While not exactly self-cleaning, advancements in windshield wiper technology could lead to more efficient cleaning mechanisms.
For instance, wipers equipped with advanced sensors could adjust their movement based on the level of dirt, providing more effective cleaning.
Automated Maintenance
Smart cars could have sensors that monitor the cleanliness of windows and trigger cleaning mechanisms when needed. This could include using water sprays, air blasts, or other methods to keep the windows clear.
Nanorobots
While still a concept in development, tiny nanorobots could be designed to move across the glass surface, cleaning it efficiently by dislodging and removing dirt particles.
Conclusion
In conclusion, when it comes to finding the best car window cleaner, there are several important factors to consider. You want a cleaner that provides a streak-free finish, is safe for tinted windows,
and has a non-ammonia formula to prevent damage. Versatility, ease of use, and a residue-free finish are also desirable features.
After researching and analyzing various car window cleaners, it is clear that different products excel in different areas.
However, two standout options that consistently meet the criteria for the best car window cleaner are the Wizards Mist-N-Shine Professional Detailer and the Detail King Sprayway Streak Free Glass Cleaner Spray.
The Wizards Mist-N-Shine Professional Detailer offers an instant and stunning shine to your vehicle. Its versatile application, quick-drying formula,
and protective qualities make it a top choice for both car enthusiasts and professional detailers. Additionally, its non-greasy formula ensures a clean, smooth finish without any residue or streaks.
On the other hand, the Detail King Sprayway Streak Free Glass Cleaner Spray boasts streak-free cleaning, convenience, and non-toxic, eco-friendly composition.
It is safe for tinted windows, provides powerful cleaning action, and leaves a crystal-clear finish. The ease of use, pleasant fragrance, and professional-quality results make it a reliable option.
Frequently Asked Questions (FAQs)
Here are some common questions and answers about cleaning windows with a spray-on glass cleaner:
How do I choose the right glass cleaner?
When selecting a glass cleaner, look for one that is specifically formulated for automotive use. Opt for products that are streak-free, ammonia-free, and safe for tinted windows. Reading product reviews and recommendations can also help you make an informed choice.
Can I use a regular cloth to clean windows?
While you can use a regular cloth, it’s recommended to use a microfiber cleaning cloth or lint-free paper towels. These materials are less likely to leave lint or streaks on the glass, ensuring a clearer result.
Should I clean windows in direct sunlight?
It’s best to avoid cleaning windows in direct sunlight or when the glass is hot to the touch. The heat can cause the cleaning solution to evaporate quickly, leading to streaks. Choose a shaded or cooler area for optimal results.
How often should I clean my windows?
The frequency of window cleaning depends on your driving conditions and personal preferences. Regular cleaning can help maintain visibility and the overall appearance of your vehicle. Aim to clean windows at least once a month or whenever you notice a buildup of dirt, grime, or smudges.
Can I use glass cleaner on tinted windows?
Yes, you can use glass cleaner on tinted windows, but ensure that the product is safe for tinted surfaces.
Ammonia-free cleaners are generally recommended for tinted windows to prevent damage to the tint film.
What if my windows are heavily soiled or have water spots?
For stubborn dirt or water spots, you may need to use a specialized glass polish or a gentle abrasive cleaner designed for glass surfaces. Follow the manufacturer’s instructions and test in a small area first.
Can I use the same cloth for wiping and buffing?
It’s advisable to use separate cloths for wiping and buffing. This helps ensure that you achieve a streak-free finish during the buffing process,
as any remaining residue from the cleaning stage may transfer to the glass during buffing.

Sium is a passionate automotive enthusiast and writer at SiumPro. With a deep understanding of cars and a keen eye for detail, Sium brings valuable insights and engaging content to readers. From reviews to tips and industry updates to delivering informative and enjoyable automotive articles.